技術情報
- 2022年03月17日
- 技術情報
DataTablesを使用したテーブル生成とサーバーサイド連携(5)
DataTablesを使用したテーブル生成方法とサーバーサイド連携方法をシェアしたいと思います。
今回はサーバーサイド側の処理でデータベースから取得したレコードをDataTables表示に反映させる部分を説明いたします。
データベースから取得したレコードをDataTables表示に反映
以下のようにレコード内容がa,b,c,d,e固定になっていた部分をテーブルから取得した
実際のレコードに書き換えます。
function user_datatables(Request $request) {

    $rec_data = [];
    //テーブルから取得した実際のレコードに書き換え
    $query = Member::query();
    $member_list = $query->get();
    foreach($member_list as $member){
        $row_data = [
            'item1' => $member->id,
            'item2' => $member->sei.$member->mei,
            'item3' => $member->sei_kana.$member->mei_kana,
            'item4' => $member->mail,
            'item5' => $member->created_at->format('Y-m-d H:i'),
        ];
        $rec_data[] = $row_data;
    }

    $draw = $request->draw;

    $res_json = array(
        'draw' => $draw,
        'recordsTotal' => '57',
        'recordsFiltered' => '57',
        'data' => $rec_data,
    );

    return response()->json($res_json);
}
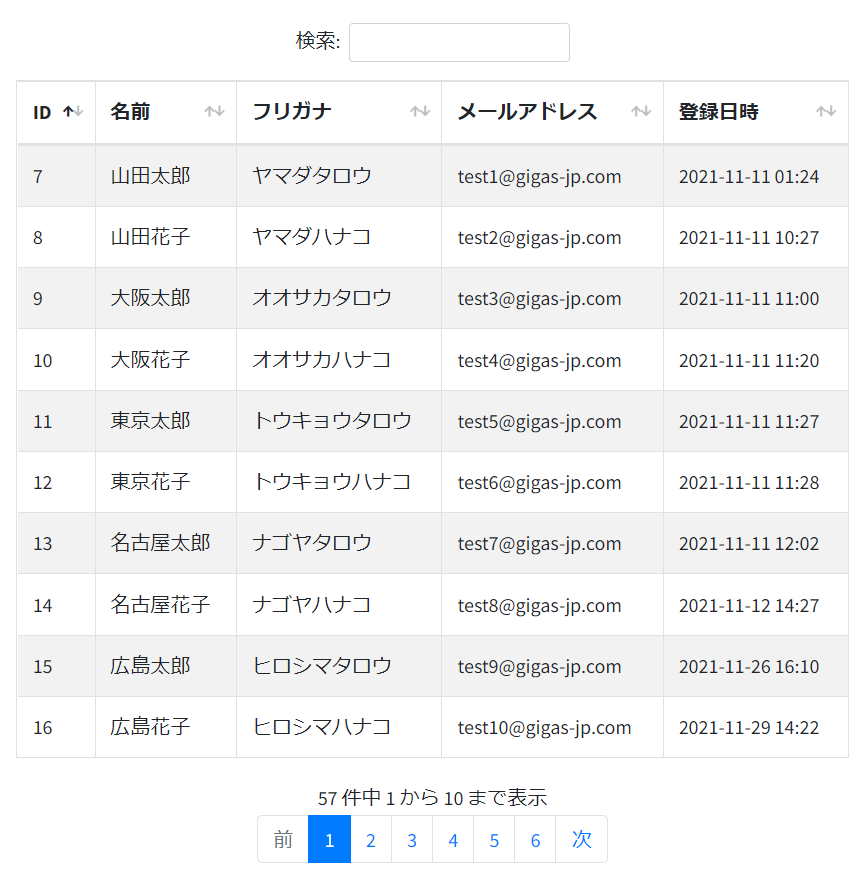
以下のようにテーブルから取得したレコードがDataTablesに反映されていることが確認できました。
ページング処理の追加
次にページング処理の作成方法を説明いたします。
サーバーサイドでページング処理を実装するために
・1ページあたりの表示件数
・何件目から表示するか
のデータが必要になりますが、これらのデータはDataTablesがpostしてくれます。
以下のように取得できます。
//1ページあたりの表示件数
$length = $request->length;
//何件目から表示するか
$start = $request->start;
Laravelでレコードの抽出処理をおこなう際に、それぞれの数値をlimitおよびoffsetに設定します。
$query->offset($start);
$query->limit($length);
またフロント側でページ番号の表示処理をおこなうためにサーバーサイドからレコードの全件件数を
返す必要がありますが、これはLaravelの以下のメソッドで取得できます。
//全件件数の取得
$total_cnt = $query->count();
次回は上記の設定をおこなったページネーションのサーバーサイド処理の説明をおこないたいと思います。
木曜日担当:nishida
nishida at 2022年03月17日 10:00:00
- 2022年03月15日
- 技術情報
Django REST Framework
Today I would like to share a brief explanation about Django REST framework. Let’s take a look.
Django REST framework is a powerful and flexible toolkit for building Web APIs. Its main benefit is that it makes serialization much easier. Django REST framework is based on Django’s class-based views. It adopts implementations such as class-based views, forms, model validator, QuerySet, etc.
Django REST Framework includes built-in API browser for testing out newly developed API. Web API developed with Django REST Framework is web browsable, supports a wide range of media types, authentication and permission policies out of the box. API’s display data can use standard function based views, or granular with powerful class based views for more complex functionality.
Good Features of Django REST framework
- Powerful Serialization that supports both ORM and non-ORM data sources.
- Web browsable API is very useful for developers.
- Authentication policies including OAuth1a and OAuth2 out of the box.
- Easy to customize validators, parsers and authenticators.
- Generic classes for CRUD operations.
- Clean and simple views for Resources by using Django’s new class based views.
- HTTP response handling, content type negotiation using HTTP Accept headers.
- Pagination simplifies the process of returning paginated data in a way that can then be rendered to arbitrary media types.
- Publishing of metadata along with querysets.
This is a brief introduction about Django REST Framework.
Hope you enjoy that.
By Asahi
waithaw at 2022年03月15日 10:00:00
- 2022年03月11日
- 技術情報
Laravel 8のメール送信の例と、alwaysTo()を使って誤送信を防ぐ方法
今回は、Laravel 8のメール送信の例と、alwaysTo()を使って誤送信を防ぐ方法を紹介します。
Laravel 8には、メール送信のためのmailクラスがあり、メール送信のためのドライバーを複数用意し、お好みで使用することができます。smtp、Mailgun、Postmark、Amazon SES、sendmailが使用できます。どのドライバを使用するかは、envファイルで設定する必要があります。
今回はsmtpドライバを使用します。
.envでSMTPを設定する
MAIL_MAILER=smtp
MAIL_HOST=smtp.gmail.com
MAIL_PORT=587
MAIL_USERNAME=Add your user name here
MAIL_PASSWORD=Add your password here
MAIL_ENCRYPTION=tls
MAIL_FROM_ADDRESS=Add your user name here
※メールを使い場合、googleアカウントのless secure app accessでturnをオンにする必要があります。
利用可能なメールクラスの作成
以下のコマンドを使用して、MyTestMailという名でメイラブルクラスを作成します。
php artisan make:mail MyTestMailMyTestMailで以下のように変更する必要があり
    public $details;
    public function __construct($details)
    {
        $this->details = $details;
    }

    public function build()
    {
        return $this->subject('Mail from AMI')
                    ->view('emails.myTestMail');
    }
ブレードビューの作成
ブレードビューファイルを作成し、送信するメールを記述します。「emails」フォルダに以下のようなファイルを作成します。
<!DOCTYPE html>
<html>
<head>
    <title>メール送信テスト</title>
</head>
<body>
    <h1>{{ $details['title'] }}</h1>
    <p>{{ $details['body'] }}</p>

    <p>Thank you</p>
</body>
</html>
最後に、テストメールを送信するための “MyTestMail “を作成します。
Route::get('send-mail', function () {
$details = [
'title' => 'Mail from AMI',
'body' => 'This is for testing email using smtp'
];
\Mail::to('name@gmail.com')->send(new \App\Mail\MyTestMail($details));
dd("Email is Sent.");
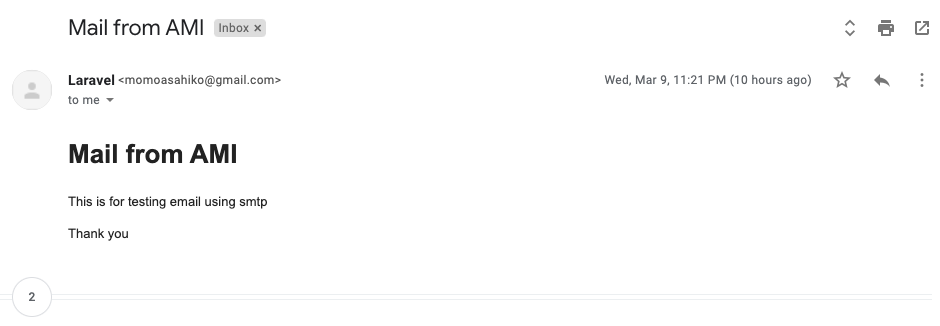
});プロジェクトを実行すると結果は
ステージング環境から実際のお客様に誤って何千通ものメールを送信してしまうこともあります。その時、どうのように設定するのかを共有します。
class AppServiceProvider extends ServiceProvider
{
    // Stuff omitted

    public function boot()
    {
        f (! app()->environment('production')) {
            Mail::alwaysTo('ex@example.org');
        }
    }
}
alwaysToで何が起きているのか?
alwaysTo() メソッドは、メールメッセージ内の to, cc, bcc に追加されたすべてのアドレスを上書きします。
そこで、上記のコードでは、Laravelに、本番環境でない場合のみ、ex@example.org にメールを送信するように指示しています。
ということで今回はこれで終わりです。
By Ami
asahi at 2022年03月11日 10:00:00
- 2022年03月08日
- 技術情報
Useful Features of Rsync Command in Linux
Today, I would like to share about usefulness of rsync command in Linux and how to back up data with cron job. Let’s take a look.
Rsync (Remote Sync) is the most commonly used command for copying and synchronizing files and directories remotely as well as locally in Linux/Unix systems. Data can be copied, synchronized and backup both remotely and locally across directories, disks & networks.
Advantages of Rsync Command
- It efficiently copies and sync files from source to destination remotely or locally.
- It supports copying links, devices, owners, groups and permissions.
- rsync allows to transfer just the differences between source and destination. The first time, it copies the whole content of a file or a directory from source to destination but from next time, it copies only the changed files/data to the destination.
- Due to using compression and decompression method while transferring data, rsync consumes less bandwidth.
Installing Rsync
rsync is preinstalled on most Linux distributions and mac-OS. If rsync hasn’t been installed on the system, it can be installed easily using your distribution’s package manager as follows.
$ sudo apt-get install rsync [On Debian/Ubuntu & Mint]
$ pacman -S rsync [On Arch Linux]
$ emerge sys-apps/rsync [On Gentoo]
$ sudo dnf install rsync [On Fedora/CentOS/RHEL and Rocky Linux/AlmaLinux]
$ sudo zypper install rsync [On openSUSE]
Rsync Basic Command Syntax
Local to Local
rsync [OPTION] [SRC] [DEST]
Local to Remote
rsync [OPTION] [SRC] [USER@]HOST:DEST
Remote to Local
rsync [OPTION] [USER@]HOST:SRC [DEST]
Common options[OPTION] used with rsync commands
-v : verbose
-r : copies data recursively (but don’t preserve timestamps and permission while transferring data.
-a : archive mode, which allows copying files recursively and it also preserves symbolic links, file permissions, user & group ownerships, and timestamps.
-z : compress file data.
-h : human-readable, output numbers in a human-readable format.
For more options, the following command can be used.
$ rsync -h
For example, to backup data from local to local(external hard drive), the following command is commonly used.
rsync -azv /home/username/projects /media/username/SPHardDrive/BackupFolder
Schedule backups
To enable scheduled backups, cron can be used for the rsync commands.
Conclusion
This is all how to copy, synchronize and backup files & directories. And I recommend the link to learn more about rsync.
Hope you enjoy that.
By Asahi
waithaw at 2022年03月08日 10:00:00
- 2022年03月04日
- 技術情報
Laravelのファイルアップロード: 重複するファイル名 – 解決するための2つの方法
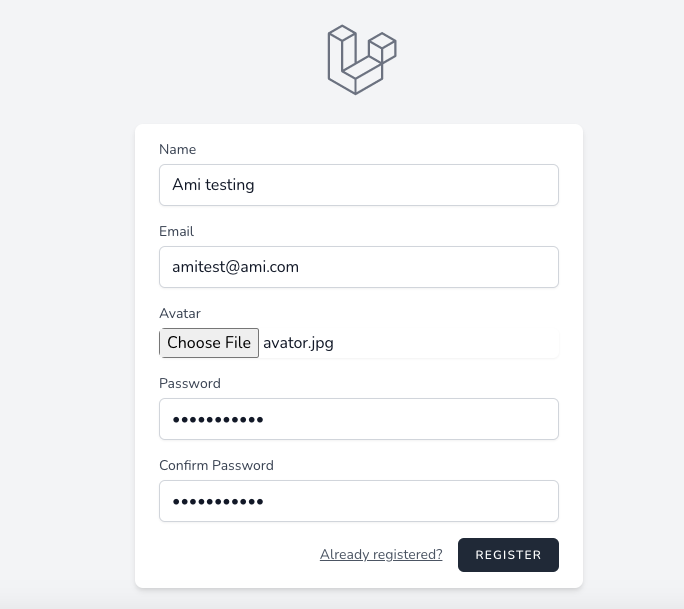
今日は、ファイルのアップロードについて、特に、同じファイル名でファイルをアップロードできるようにするとどうなるか、古いファイル名を上書きしてしまうか、それをいろいろとお話したいと思います。
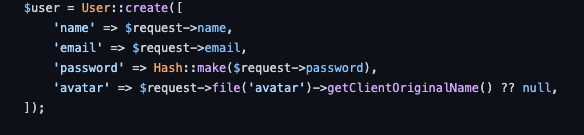
例えば、デフォルトで登録フォームがあり、アバターがあり、誰かがavator.jpgというファイル名でファイルをアップロードしたとします。これは正常にアップロードされているのですが、開発者がよくやるのは、ClientOriginalNameが悪意のないものであることを信じてファイル名をアップロードすることです。
しかし、元のファイル名を保持したい場合は、それは大丈夫かもしれません。しかし、同じファイル名で登録した人がいて、そのファイルがstorage/app/public/avatorsにavator.jpgとしてアップロードされた場合、問題が発生することがあります。
そして、別のユーザーで登録しようとし、ユーザー情報を入力し、異なるパスからアバターをアップロードしますが、ファイル名は同じです。登録後、古いアバターはやみくもに上書きされ、サーバーから削除されることさえあります。というわけで、これは今問題になっています。どのようにコードでそれを解決するかは、いくつかの異なる方法があります。

ということで、今からこの方法をお話ししたいと思います。
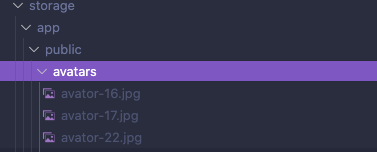
1つ目はファイル名を変更する方法です。
if ($request->file('avatar')) {
            $fileName = pathinfo($request->file('avatar')->getClientOriginalName(), PATHINFO_FILENAME) . '-' . $user->id . '.' . $request->file('avatar')->getClientOriginalExtension();

            $request->file('avatar')->storePubliclyAs('avatars', $fileName, 'public');

            $user->update([
                'avatar' => $fileName ?? null,
            ]);
        }
アベータがある場合、拡張子なしのファイル名からファイルを作成し、ユーザ登録からuser_id、そしてオリジナルの拡張子からファイルを構築することになります。そして、そのファイルをファイル名と一緒にパブリックドライバに保存し、ユーザを更新します。
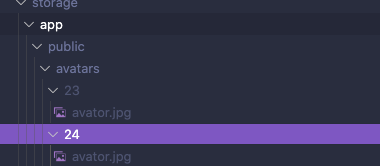
2つ目はサブフォルダを作成する方法です。
$request->file('avatar')->storePubliclyAs("avatars/{$user->id}", $request->file('avatar')->getClientOriginalName(), 'public');publicのuser_idサブフォルダに元のファイル名で保存します。
結果一覧

はい。ということで今回は以上になります。
By Ami
asahi at 2022年03月04日 10:00:00
 大人が楽しめるヒーリング絵本河童のカパと静かな森
 パワースポット 日本三大神滝布引の滝
 佐藤・広幸ドイツ魂
 Himeji Castle姫路城
 ボイドタイムお知らせアプリVoid Time 〜月を無視できない〜
 撮った写真をカレンダーに撮りカレ