アプリ関連ニュース
- 2021年6月24日
- 他の話題
iPerf3を使用したネットワーク速度計測
nishida at 2021年06月24日 10:00:13
WindowsをAndroidタブレットから操作しよう
「安価なAndroidタブレットは便利だけど、
Windowsで使っているソフトがつかえたらな」
と思うことがたまにあります。
そこで便利なのが、AndroidからWindowsへリモートデスクトップ接続が行える
Remote Desktopです。
まず初めに接続先のWindowsでリモートデスクトップ接続を有効にします。
設定画面から「システム」->「リモートデスクトップ」へと進み
「リモートデスクトップを有効にする」をオンにします。
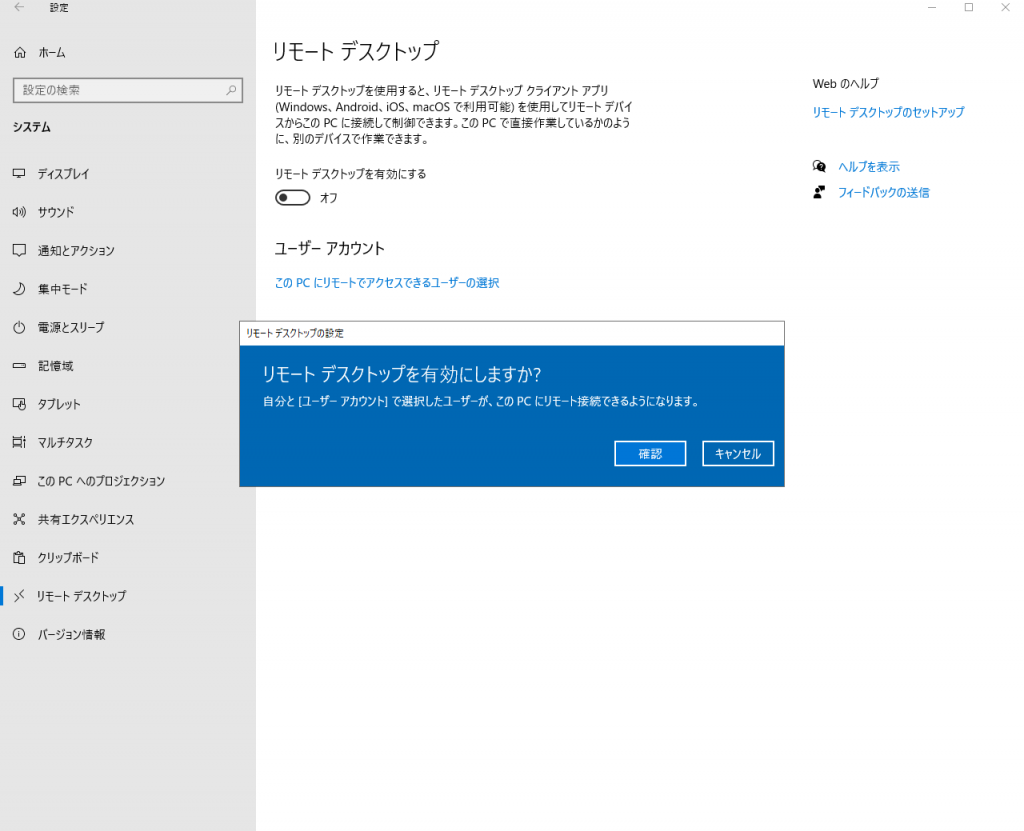
その後、必要に応じてリモートアクセス可能なユーザーを選択します。
次に、Android端末にインストールした Remote Desktop アプリを起動し、
「PCs」画面を開き、右上にある「+」ボタンをタップすると
自動的にネットワーク上にある接続可能なPCが表示されます。
ここに表示されていればソレを選択し、なければ、
「Add Manually」から接続対象のPCのipアドレスを指定します。
アクセスするユーザーのログイン情報を尋ねられるので、
ユーザー名とパスワードを入力し認証を完了します。
これで接続完了です。
このままでも使用できますが、
マウスでの操作をタップで行うのは難しいところがあるので、
リモートデスクトップ接続を解除し、
接続先のWindowsの設定を変更し、タブレットモードを有効にしましょう。
設定画面から 「システム」->「タブレット」へと進み、
「サインイン時の動作」を「常にタブレットモードを使用する」へ変更した後
再度 リモートデスクトップ接続 を行うことでタブレットモードで操作できます。
水曜担当:Tanaka
tanaka at 2021年06月23日 10:00:42
- 2021年6月21日
- Web Service
A touch to serverless framework part 1
A few weeks ago, I wrote an article about serverless and today I will make a touch to serverless framework using node.js and AWS (Amazon web service). This is just a simple and getting started article how to use serverless framework. I will be using mac OS for the operating system.
I will divided the parts because this article might be long as the article includes screenshots. So lets get started.
First, we need to check the node version in your computer. Check with node – v in your computer. Then we will install the serverless framework using npm.
sudo npm install -g serverless We will get a result like this at the end of installation.
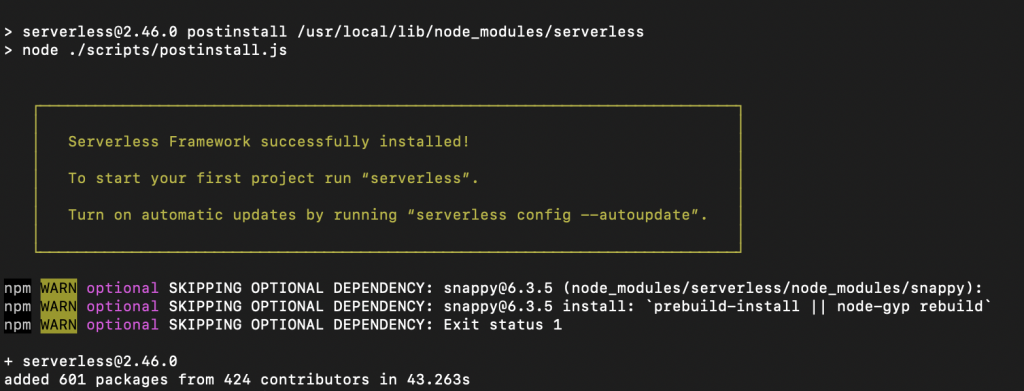
You can test whether serverless is installed on your computer or not using serverless or sls.
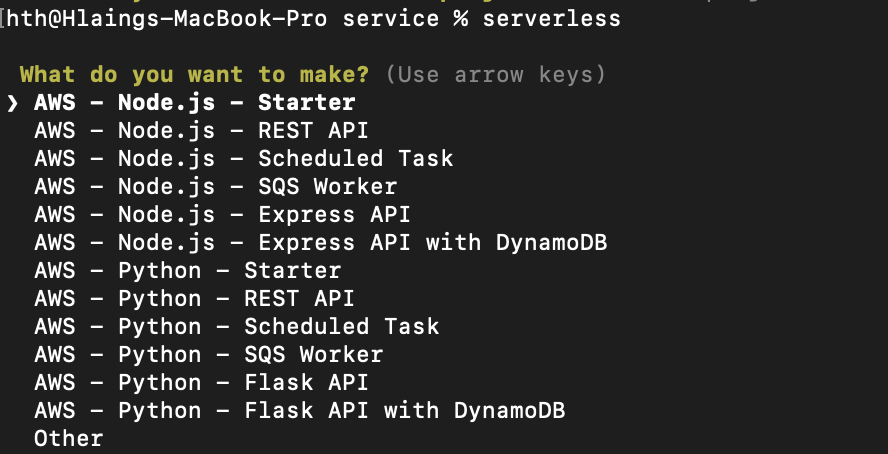
Ok , now we need to create IAM at Amazon console panel. Lets see the steps in below.
Here is the IAM dashboard.
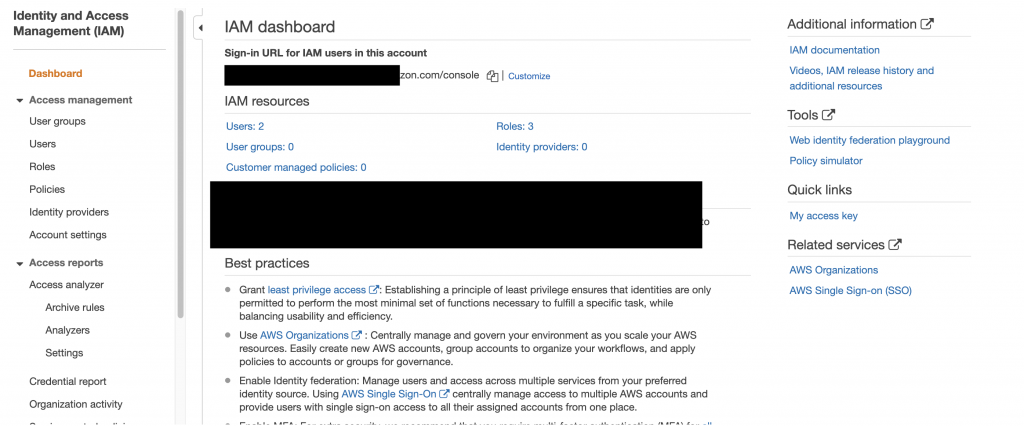
Then we will create a new IAM user to integrate with our serverless project.

Add a username and mark the checkbox on programmatic access. Then go to next step for permission.
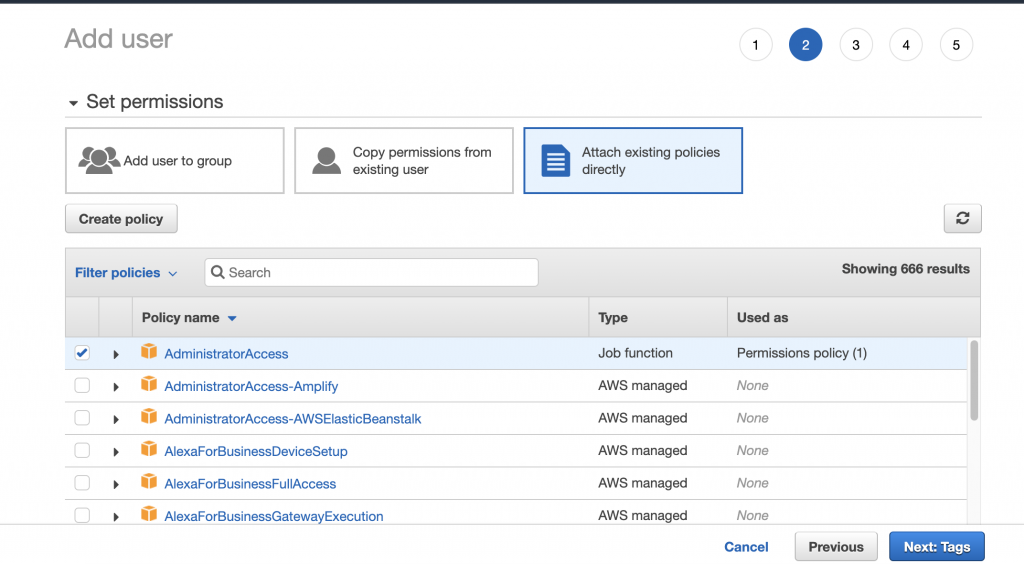
We will grant the user for administrator access for now as we want to build services from serverless configuration later on.
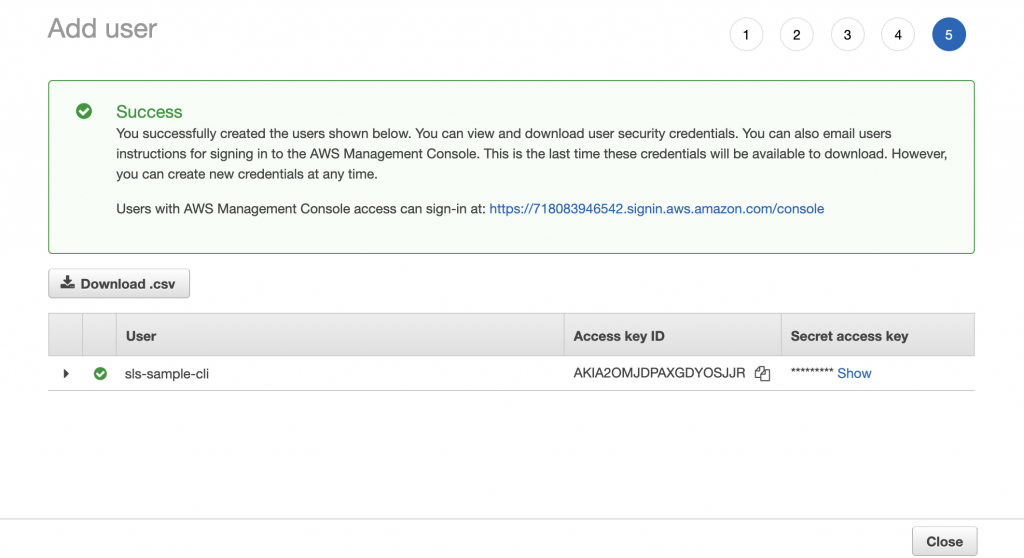
As a final step, we will get a new IAM user with access key and secret access key. We will use these keys to setup credentials in our serverless project. Lets create credentials as below
serverless config credentials --provider aws --key YOUR-ACCESS-KEY --secret YOUR-SECRET-ACCESS-KEY
This will be the correct response after hitting the above command and now we have successfully created credentials with IAM user.
In the next week, I will be talking about creating a project and start deploying from our serverless project.
Yuuma
yuuma at 2021年06月21日 11:32:52
- 2021年6月18日
- 技術情報
Laravel 8 Push Notification using Firebase[1]
Firstly create a new fresh Laravel project using a composer command:
composer create-project laravel/laravel push-notification-appThen go to the app’s root:
cd push-notification-app/Database Connection
Secondly, to make a database connection in .env file filling with database name, username, password.
DB_CONNECTION=mysql
DB_HOST=127.0.0.1
DB_PORT=3306
DB_DATABASE=database_name
DB_USERNAME=database_user_name
DB_PASSWORD=database_password
Install Laravel UI Scaffolding
Next, install ui package and create auth scaffolding based on Bootstrap CSS framework.
composer require laravel/uiAfter that, need to install to manifest bootstrap auth ui.
php artisan ui bootstrap --authYou have to suggested commands to compile your fresh scaffolding.
npm install && npm run devUpdate Server Key in User Table
We need to add a new column in the current user table.
php artisan make:migration add_column_device_tokenSubsequently, we need to add this device token key in the new table.
class AddColumnDeviceToken extends Migration
{
    /**
     * Run the migrations.
     *
     * @return void
     */
    public function up()
    {
        //
        Schema::table('users', function (Blueprint $table) {
            $table->string('device_token')->nullable();
        });
    }
After that, move the device key to the user table.
class User extends Authenticatable
{
    use HasFactory, Notifiable;

    /**
     * The attributes that are mass assignable.
     *
     * @var array
     */
    protected $fillable = [
        'name',
        'email',
        'password',
        'device_token'
    ];
Then type to run migrate execute command.
php artisan migrateNext week I will show you how to get the Firebase cloud messaging server key and Firebase web app’s configuration credentials.
By Ami
asahi at 2021年06月18日 10:00:02
- 2021年6月16日
- 他の話題
Switchでゲームプログラミング
tanaka at 2021年06月16日 10:00:51
 大人が楽しめるヒーリング絵本河童のカパと静かな森
 パワースポット 日本三大神滝布引の滝
 佐藤・広幸ドイツ魂
 Himeji Castle姫路城
 ボイドタイムお知らせアプリVoid Time 〜月を無視できない〜
 撮った写真をカレンダーに撮りカレ