アプリ関連ニュース
- 2021年6月14日
- Web Service
Adding Recaptcha verification to your form
We all create forms in your system & applications. If you are a web developer , you may experience once or more creating forms. For example contact form , registration form etc. Recaptcha is a free service supported by Google which helps to protect our websites from spam and abuse. Basically A “CAPTCHA” is a test to separate human and bots apart.
Today I will guide you how to add a reCAPTCHA service in your form easily.
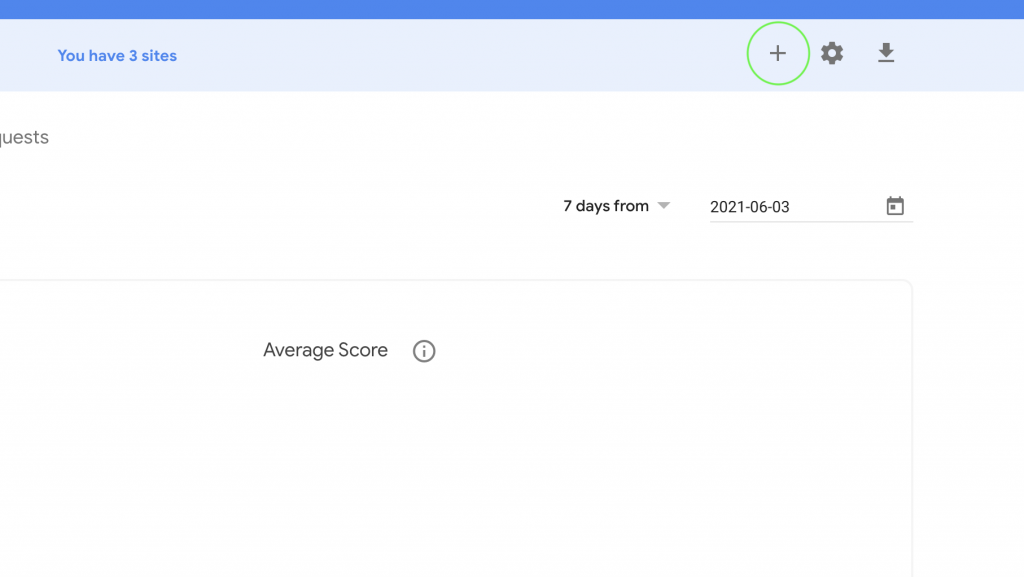
First thing first, we need to generate a reCAPTCHA key to add in our form. You can go to this link and click + button to create a key.
This will proceed to a form to choose the options like this.
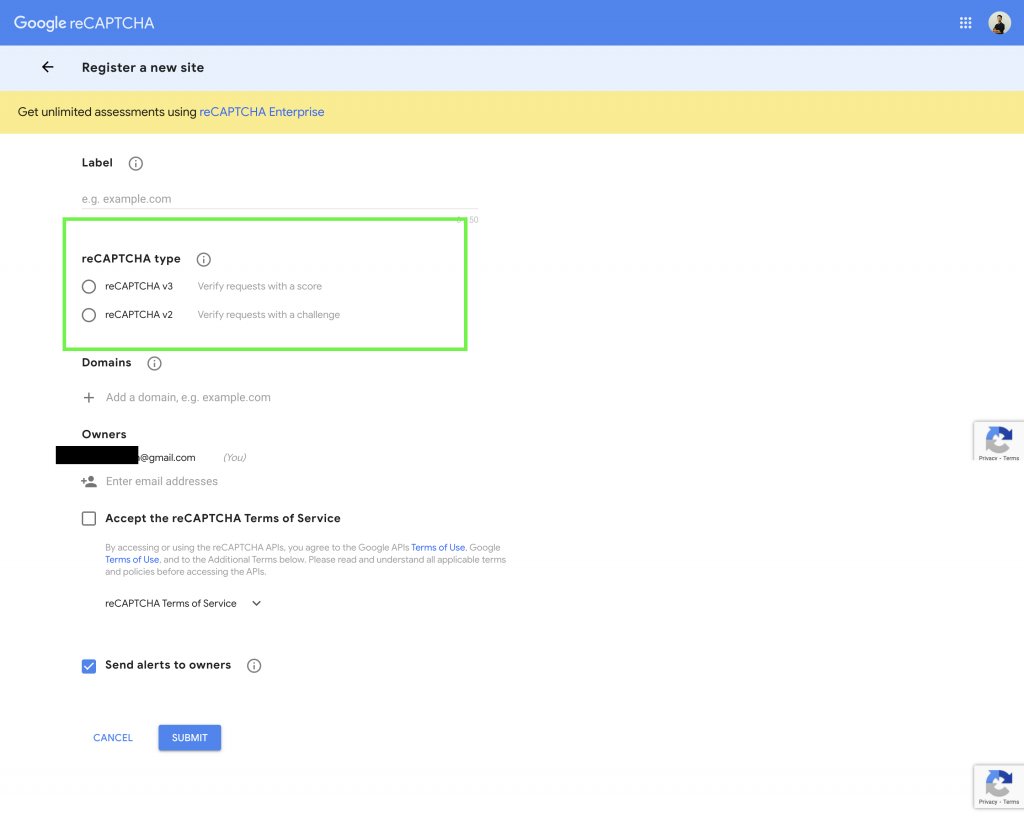
There are two versions of reCAPTCHA type for now , version 2 and 3. With reCAPTCHA v2, the only action required was to check if the user successfully solved the challenge or not. With reCAPTCHA v3, you must now decide what action to take based on the score. you may choose depending on your favour. In this tutorial , I will use v2 as I like its simplicity.
After filling up the form, you will get the reCAPTCHA site key like this.

For the source code part, we need to import the reCaptcha API JS in a script tag like this.
<script src=https://www.google.com/recaptcha/api.js></script>And we can embed our site key in HTML.
<div class="g-recaptcha" data-sitekey="YOUR-SITE-KEY-HERE"></div>Of course you can modify the css class as you like. For the validation, we can use grecaptcha.getResponse()function to validate the reCAPTCHA response. I will add a example code which is used in my project.
//This is just a sample code and can differ depending on your //source code.
if ($('.g-recaptcha').length > 0) {
   if (grecaptcha.getResponse() == "") {
      flag = 1;
        alert('Please verify Recaptch');
   } else {
      flag = 0;
   }
}

// You can also read the official documentation.
// https://developers.google.com/recaptcha/intro
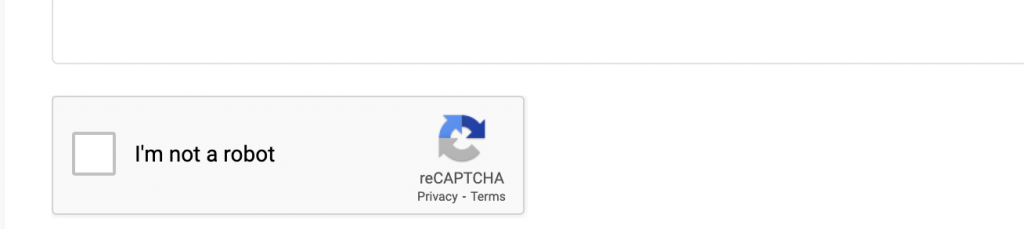
As a final result on the browser, you will get a reCAPTCHA checkbox like this. This may also differ depending on your design preferences.
By Yuuma
yuuma at 2021年06月14日 11:00:28
- 2021年6月11日
- 未分類
Tips for Excel calculation
Today I would like to share some important tips about excel calculation. Sometimes, we change today date but it change automatically arriving today date when we open the file.
In this time, how to fix it.
How to Change Excel Calculation Options
Select the data we want to change and go the Excel ribbon > Formulas tab > Calculation group, click the Calculation Options button and select one of the following options:

Automatic (default) – tells Excel to automatically recalculate all dependent formulas every time any value, formula, or name referenced in those formulas is changed.
Manual – turns off automatic calculation in Excel. Open workbooks will be recalculated only when you explicitly do.
How to force recalculation in Excel
To manually recalculate all open worksheets and update all open chart sheets, go to the Formulas tab > Calculation group, and click the Calculate Now button.

Hope you find it interesting and useful.
By Ami
asahi at 2021年06月11日 10:00:36
- 2021年6月07日
- 技術情報
[Laravel] Adding custom data to eloquent result
Sometimes, we want to add more custom data to our eloquent result before passing to blade or doing further logic improvements. Today we will be focusing how to add custom data to our eloquent result.
I assume you already know laravel framework in this article as we will not covering from scratch of laravel framework. First let’s make a posts table. Here is the migration file.
Schema::create('posts', function (Blueprint $table) {
  $table->id();
  $table->string('name');
  $table->string('description');
  $table->timestamps();
});
In our post table, we will have these columns in above. And we gonna add a data record. You can add manually using database clients or you can of course make a seeder class to add dummy data like this
DB::table('posts')->insert([
  'name' => Str::random(10),
  'description' => Str::random(100),
  'created_at' => date('Y-m-d H:i:s'),
]);
Lets go to our controller and select the data with all method and print the result with dd function.
$data = Post::all();
dd($data);
The output will be look like this.
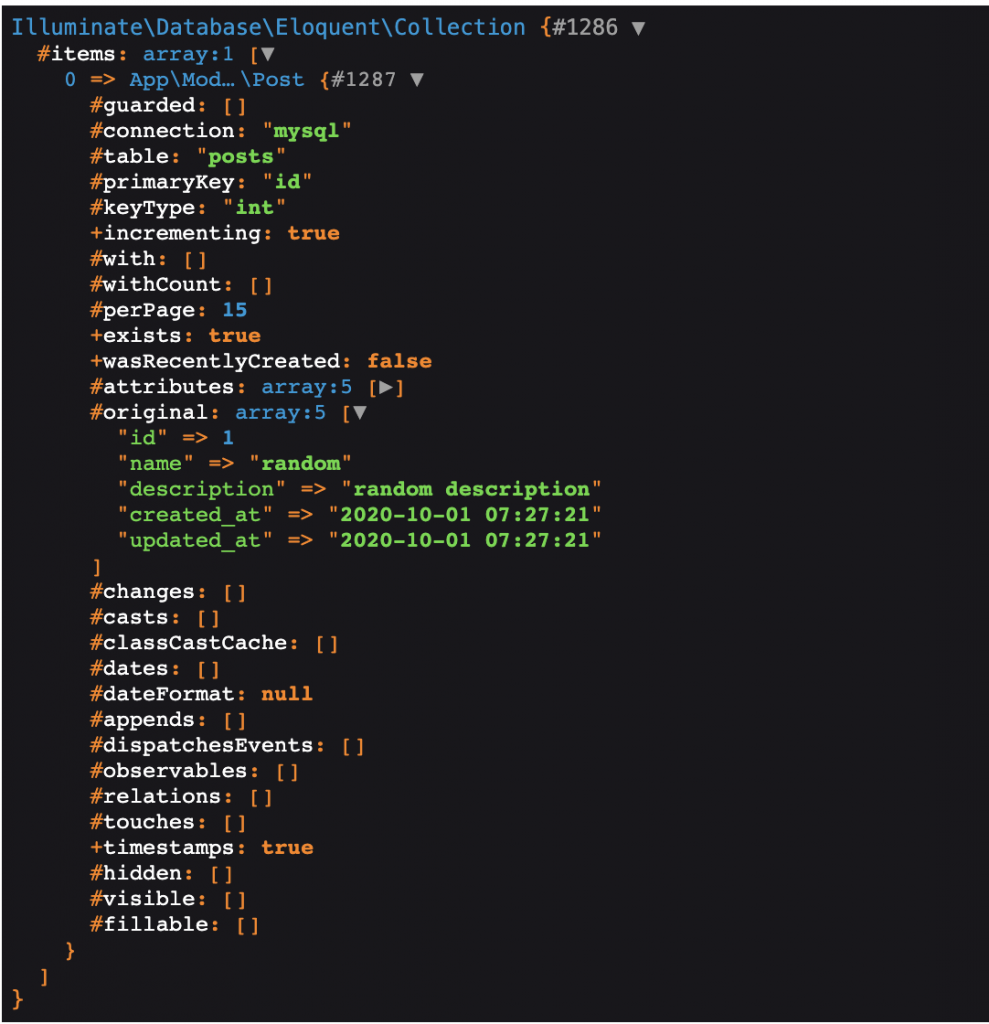
Now , let’s try to add a new column called category_id and user_id to that eloquent results. We can achieve this using map function.
$data = Post::all();

$data->map(function ($result) {
  $result->category_id = 1;
  $result->user_id = 2;
  return $result;
});

dd($data);
And the result will be look like this. Please remember there are two arrays called attributes which is the one we customized and added the data. And there is also original array which contains only original data from eloquent.

Anyhow, we can access our created data using map like always. For further more to customize the eloquent results , please check out here.
dd($data[0]->category_id.','.$data[0]->user_id);
//result -> 1,2
If you need to loop through many data, you can use loop functions but in this case I just added a 0 index to get data easily.
By Yuuma
yuuma at 2021年06月07日 11:10:35
- 2021年6月04日
- 技術情報
How to install Node.js and NPM in your MacOS
Yesterday I wanted to install NPM with package download, such kind of command error message occurred.
Command on found on zshThen I try to add new some command, I got it zsh shell command. So this time I would like to share you how to install both Node.js and NPM with MacOs for new terminal.
Prerequisites
Firstly by typing git that will show you command line tools installed.
gitTo see what shell your terminal currently is in, from the command line type in:
echo $0If you’re in the bash shell, you’ll see printed out:
-bashIf you’re in the zsh shell, you’ll see printed out:
-zshSwitch Your Default Shell To zsh
To switch your shell to the zsh shell, you may enter:
chsh -s /bin/zshTo switch back to the bash shell, you may enter:
chsh -s /bin/bashStep by step installation
Make a directory and enter the folder and add this really nifty package manager for zsh called antigen.zsh
curl -L git.io/antigen > antigen.zshNow we’re going to configure our .zshrc file:
nano ~/.zshrcThen you’ll want to write such kind of .zshrc file:

Then restart your terminal. Now you can finally install Node.js and NPM with a single line using nvm!
nvm install --ltsI hope you have found this useful.
By Ami
asahi at 2021年06月04日 10:00:17
- 2021年5月31日
- 技術情報
Serverless
Have you heard about serverless architecture ? Well it doesn’t mean there is no server for your code. Technically serverless is a framework or architecture to save the expensive server costs. Lets see how it does.
As we all know, a server is a computer where an application is deployed. Most developers deploy their code on a remote server where someone else takes care of hardware and software maintenance. That is what most of us are doing. At this point, servers could be expensive even for small projects, it can be a big impact. Your server must be running 24 hours a day to be able to handle requests at any time.
As I said in above, serverless does not mean there is no server. The serverless infrastructure runs on someone else’s managed server. This means you don’t have to worry about maintenance, network security, or uptime. And we only have to pay when our code is being executed which means it will only charged for the amount of time and memory used.
We all know horizontal & vertical scaling when it comes to handling the traffic from users. Both of the options can be expensive, isn’t it ? Well in serverless, you can scale to millions of requests. No new infrastructure required! There is no need to add new servers.
Well, that is all for now. You can try it out serverless in below services.
Although it is powerful to scale up your application with more affordable cost, there might be some drawback also. For example, caching and debugging can be tricky. And of course, you have to learn the new tools to configure it which can be tricky as well.
Yuuma
yuuma at 2021年05月31日 11:00:55
 大人が楽しめるヒーリング絵本河童のカパと静かな森
 パワースポット 日本三大神滝布引の滝
 佐藤・広幸ドイツ魂
 Himeji Castle姫路城
 ボイドタイムお知らせアプリVoid Time 〜月を無視できない〜
 撮った写真をカレンダーに撮りカレ