アプリ関連ニュース
- 2021年9月10日
- 技術情報
Flutter – Clipboard
This week also let’s learn flutter new things. I will show you how to copy and paste a text with flutter. Let’s start coding.


First thing we need to do is add this clipboard package in pubspec.yaml file.
flutter pub add clipboardCopy to clipboard
FlutterClipboard.copy(field.text).then(( value ) => print('copied'));Paste from clipboard
FlutterClipboard.paste().then((value) {
    // Do what ever you want with the value.
    setState(() {
      field.text = value;
      pasteValue = value;
    });
  });
For text editing field :
TextEditingController field = TextEditingController();
TextFormField(
                controller: field,
                decoration: const InputDecoration(
                    hintText: 'Enter text'
                ),
              ),
Hope you enjoyed this article!
By ami
asahi at 2021年09月10日 10:00:00
GPUマイニングをやってみました
tanaka at 2021年09月08日 10:00:05
- 2021年9月06日
- Web Service
The structure of JWT
I talked about JWT last week and we get the basic idea of what is JWT, how it works etc. Today I will talk about the structure of JWT and its pros and cons.
If you haven’t read about JWT, you can read it here. So lets get started.
A JWT contains 3 parts separated by a “.” sign. These are header, payload and signature.
You can also take a look and can play debugging of these three parts at the official website of JWT called jwt.io
Header
Header contains the type of token and algorithm used for signing and encoding. Algorithms can be HMAC, SHA256, RSA, HS256 or RS256.
{
  "typ": "JWT",
  "alg": "HS256"
}
Payload
Payload contains the data we are exchange through client and server. Here is the sample payload.
{
  "uid": "1234567890",
  "name": "yuuma",
  "iat": 1231313123
}
We can also add expiration payload to add expiration date of that token. We have to be careful about sensitive informations since, JWT can be decoded easily.
Signature
Signatures are the most important part of JWT. It is calculated by encoding the header and payload using the Base64url encoding and concatenating them with a dot sign. This is then passed to the encryption algorithm. If he header or payload changes, signature has to calculated again.
//sample from jwt.io
HMACSHA256(
  base64UrlEncode(header) + "." +
  base64UrlEncode(payload),
  your-256-bit-secret
) secret base64 encoded
Tips
We have to be careful about these facts if we are using JWT token in your authorization mechanism
- Use HTTPS to protect the Authorization header.
- Better to prepare with blocklist tokens as the attacker might get JWT token before it’s expiration date.
- If the JWT is cookie-persistent, you need to create an HttpOnlyCookie. This restricts third-party JavaScript from reading the JWT token from the cookie.
- For XSS, the server side should always sanitize user-generated data.
- For CSRF, have to mitigate CSRF by using the source of the request and special request headers.
yuuma at 2021年09月06日 10:30:03
- 2021年9月03日
- 技術情報
Flutter – Scrollbar
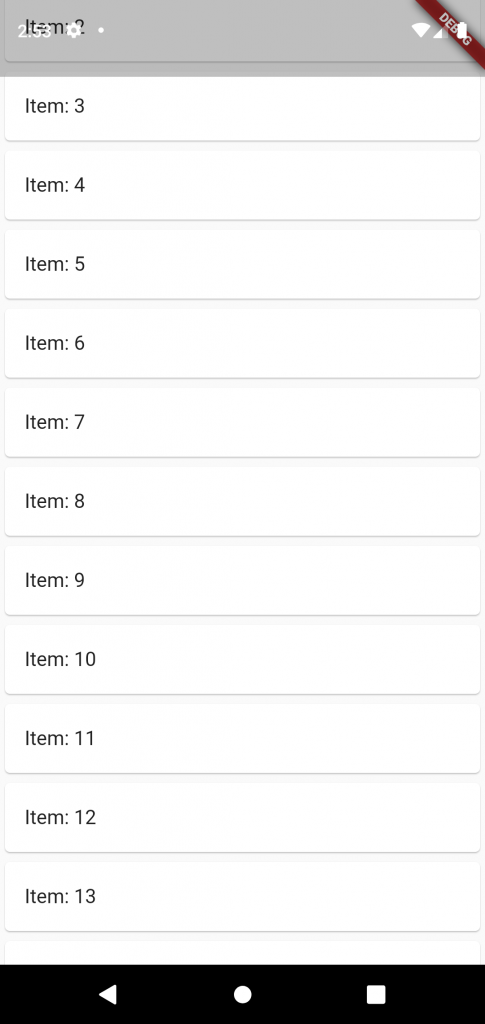
This week I would like to share about scrollbar widget and how to use it. Let’s go and start code!
By default scrollbar widget in flutter don’t show a scrollbar. But that’s fine in many cases but in others, you do want to display a scrollbar. Scrollbars show the users how far they’ve scrolled, and they allow things like jumping to a particular point in the list.
To show scrollbar use the widget called Scrollbar!
Make sure the scrollbar widget is finite. For example, it’s a ListView.builder, make sure itemCount is defined.
return MaterialApp(
      home: Scaffold(
        body: Center(
          child: Scrollbar(
            child: ListView.builder(
              itemCount: 20,
              itemBuilder: (context, index) {
                return Card(
                  child : ListTile(
                    title: Text("Item: ${index + 1}"),
                  )
                );
              }
            )
          ),
        )
      )
    );
Hoped you enjoyed this article!
By Ami
asahi at 2021年09月03日 10:00:13
- 2021年9月01日
- Windows
Windows11が10月5日にリリースされるようです。
tanaka at 2021年09月01日 10:00:41
 大人が楽しめるヒーリング絵本河童のカパと静かな森
 パワースポット 日本三大神滝布引の滝
 佐藤・広幸ドイツ魂
 Himeji Castle姫路城
 ボイドタイムお知らせアプリVoid Time 〜月を無視できない〜
 撮った写真をカレンダーに撮りカレ