アプリ関連ニュース
- 2022年1月14日
- 技術情報
Laravel8でFullcalendarとAJAXを使ってイベントを作成する
今週は、Laravel 8アプリにFullcalendar JavaScriptイベントカレンダープラグインを使用してイベントを作成・削除する方法を紹介します。
今回はプロジェクトのセットアップをスキップします。
プロジェクトの設定後、イベントの作成、削除を行うために、新しいカレンダーを作成する必要があります。そのために
php artisan make:controller FullCalenderControllerそして、app\Http\Controllersの中の、FullCalenderController.phpで、FullcalendarイベントのビューとCDオペレーションを設定することになります。
public function index(Request $request)
    {
        if($request->ajax()) {
            $data = Event::whereDate('start', '>=', $request->start)
                ->whereDate('end',   '<=', $request->end)
                ->get(['id', 'title', 'start', 'end']);
            return response()->json($data);
        }
        return view('welcome');
}この関数は、作成したイベントが表示されていることを取得します。public function calendarEvents(Request $request)
{
switch ($request->type) {
case 'create':
$event = CrudEvents::create([
'event_name' => $request->event_name,
'event_start' => $request->event_start,
'event_end' => $request->event_end,
]);
return response()->json($event);
break;
case 'delete':
$event = CrudEvents::find($request->id)->delete();
return response()->json($event);
break;
default:
# ...
break;
}
}リクエストタイプはcreateで、create caseを入力すると、イベントが作成され、json形式で返されます。
リクエストタイプはdeleteで、delete caseを入力すると、作成されたイベントを削除して、json形式で返されます。
Controllerがセットアップされたので、次は routes/web.php ファイルに移動します。このファイルでは、ルートを作成するために FullCalenderControllerを使用する必要があります。
Route::get('calendar-event', [FullCalenderController::class, 'index']);
Route::post('calendar-crud-ajax', [FullCalenderController::class, 'calendarEvents']);
最後に、laravel bladeのビューファイルでフFull calenderを表示し、jQueryのAJAXリクエストでイベントの作成、削除を行う必要があります。
<script src="https://cdnjs.cloudflare.com/ajax/libs/jquery/3.1.1/jquery.min.js"></script>
<script src="https://cdnjs.cloudflare.com/ajax/libs/moment.js/2.29.1/moment.min.js"></script>
<script src="https://cdnjs.cloudflare.com/ajax/libs/fullcalendar/3.10.2/fullcalendar.min.js"></script>
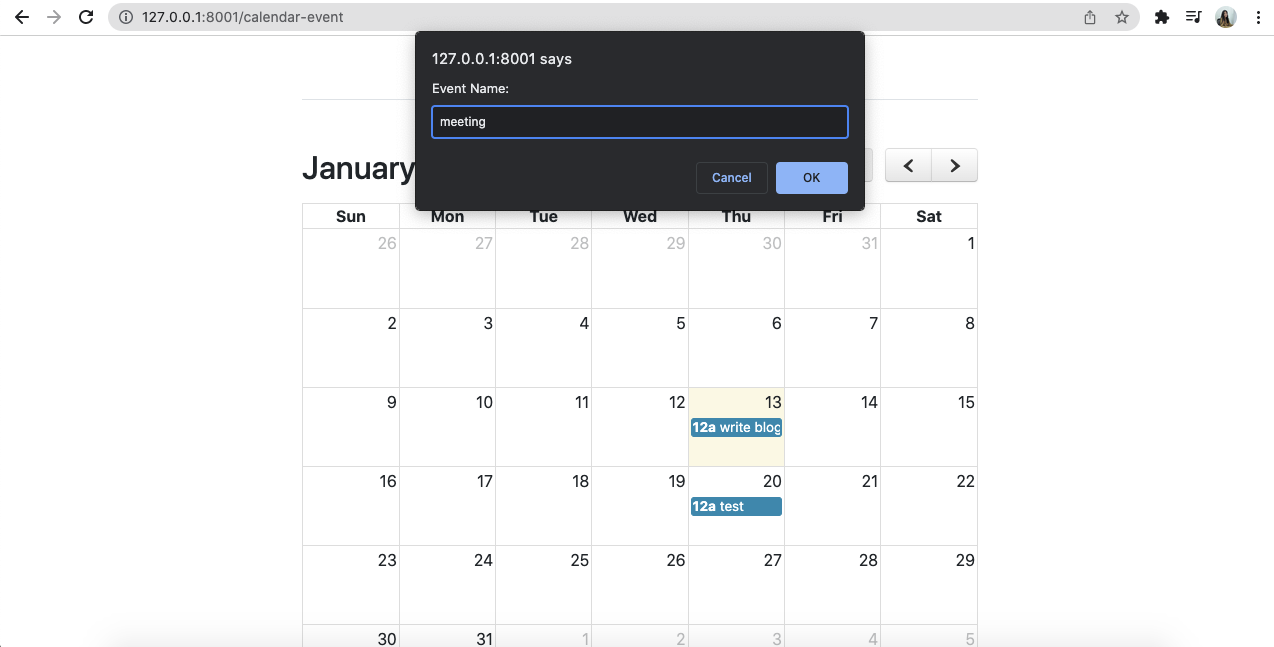
<script src="https://cdnjs.cloudflare.com/ajax/libs/toastr.js/latest/toastr.min.js"></script>カレンダーの日をクリックすると、入力タイプのフィールドが表示され、OKボタンをクリックすると、ajaxリクエストでコントローラに移動し、ajaxリクエストで戻り、イベントが作成されます。
また、作成したイベントをクリックすると、アラートボックスが表示され、OKボタンをクリックすると、作成したイベントが削除されます。
この状態に対して
$(document).ready(function () {

            var SITEURL = "{{ url('/') }}";

            $.ajaxSetup({
                headers: {
                    'X-CSRF-TOKEN': $('meta[name="csrf-token"]').attr('content')
                }
            });

            var calendar = $('#full_calendar_events').fullCalendar({
                editable: true,
                editable: true,
                events: SITEURL + "/calendar-event",
                displayEventTime: true,
                eventRender: function (event, element, view) {
                    if (event.allDay === 'true') {
                        event.allDay = true;
                    } else {
                        event.allDay = false;
                    }
                },
                selectable: true,
                selectHelper: true,
                select: function (event_start, event_end, allDay) {
                    var event_name = prompt('Event Name:');
                    if (event_name) {
                        var event_start = $.fullCalendar.formatDate(event_start, "Y-MM-DD HH:mm:ss");
                        var event_end = $.fullCalendar.formatDate(event_end, "Y-MM-DD HH:mm:ss");
                        $.ajax({
                            url: SITEURL + "/calendar-crud-ajax",
                            data: {
                                event_name: event_name,
                                event_start: event_start,
                                event_end: event_end,
                                type: 'create'
                            },
                            type: "POST",
                            success: function (data) {
                                displayMessage("Event created.");

                                calendar.fullCalendar('renderEvent', {
                                    id: data.id,
                                    title: event_name,
                                    start: event_start,
                                    end: event_end,
                                    allDay: allDay
                                }, true);
                                calendar.fullCalendar('unselect');
                            }
                        });
                    }
                },

                eventClick: function (event) {
                    var eventDelete = confirm("Are you sure?");
                    if (eventDelete) {
                        $.ajax({
                            type: "POST",
                            url: SITEURL + '/calendar-crud-ajax',
                            data: {
                                id: event.id,
                                type: 'delete'
                            },
                            success: function (response) {
                                calendar.fullCalendar('removeEvents', event.id);
                                displayMessage("Event removed");
                            }
                        });
                    }
                }
            });
        });

        function displayMessage(message) {
            toastr.success(message, 'Event');
        }

    </script>
開発サーバーの実行
php artisan serve結果は上部に表示されます。
最後までお読みいただき、ありがとうございました。
By Ami
asahi at 2022年01月14日 10:00:00
- 2022年1月13日
- Web Service
ES9 Features
EcmaScript is the “official” name for JavaScript. It was eventually abandoned and ES3.1 became ES5, which is the JavaScript version used in the “HTML5” world. ECMAScript is the “standard for” the JavaScript language.
ECMAScript2018 or ES9 has been evolving for the last few years and it has improved a lot.
The top features of the ES9 are
1.Object Rest/Spread Properties
If you want to extract an object excluding one or more properties, you can do it in ES9. It was not possible in the previous versions.
Here is an example:

Output is

2.Regular Expressions (RegExp) named Groups
A capture group can be given a name using the (?<name>...) syntax. The groups can be accessed via the ‘groups’ property of the regular expression’s result. Numbered references to groups are also created as usual.
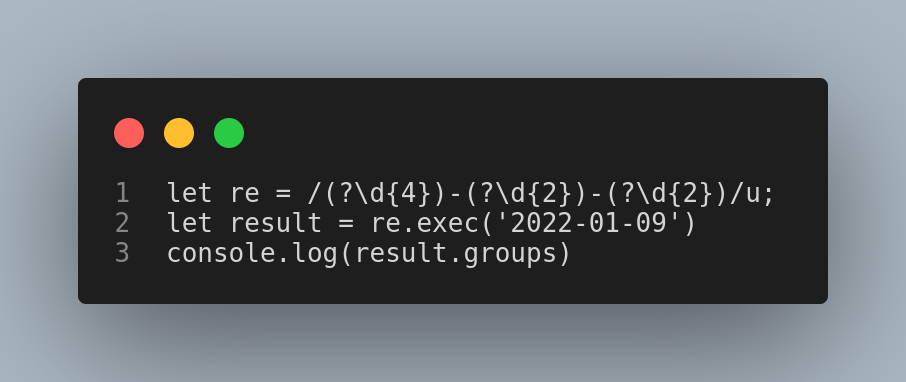
Output is :

3.Asynchronous Iterators
ES9 introduces the AsyncIterator interface, an asynchronous iteration statement (for — await — of), and async generator functions. The for — await — of statement creates a loop iterating over async iterable objects as well as on sync iterables. The loop can only be used in an async function.
Syntax:
for await (const variable of iterable) {
statement
}
4. Promise.prototype.finally
Promises now include a ‘finally’ method. You can use this when you want to perform an action irrespective of the promise being fulfilled or rejected. A good example of this would be turning off a loader after an API call is completed.
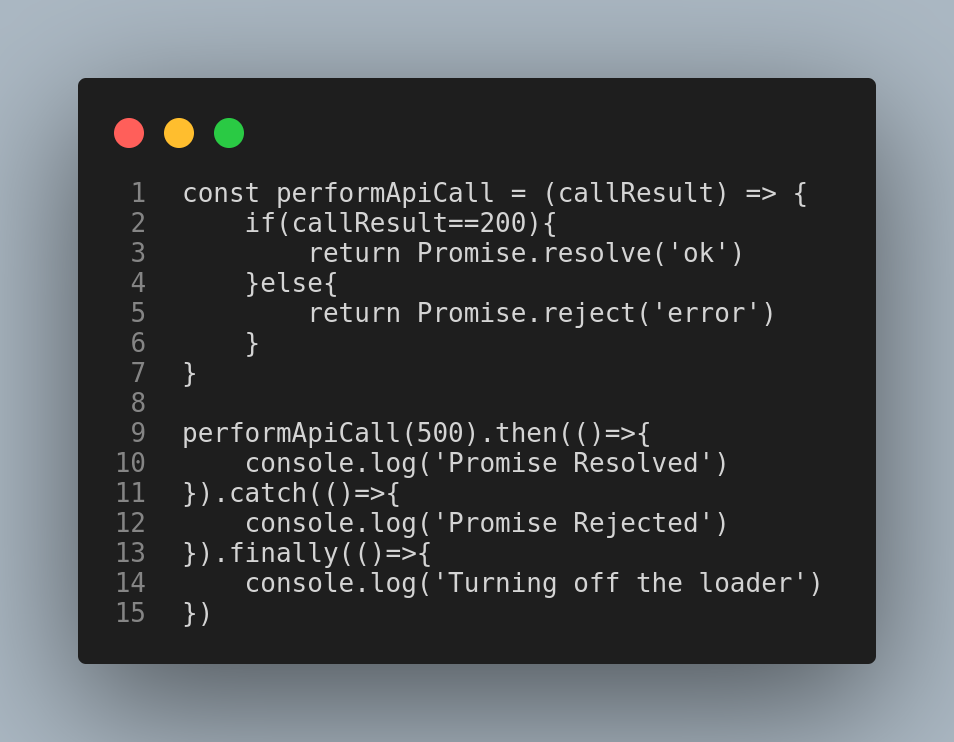

Output when 200 is passed.

Output when 500 is passed.
These were the features of ES9 that will definitely help to code in a better way.
Tsuki
tsuki at 2022年01月13日 10:00:00
- 2022年1月07日
- 技術情報
JetStreamを使用してLaravel 8 Livewire CRUDアプリケーションの作成
今回は、Laravelアプリケーションに必要不可欠なCRUD操作を、LivewireとJetstreamのパッケージを使って簡単に作成する方法を紹介します。
プロジェクトの設定
新しいlaravelアプリをインストールするので、ターミナルに向かい、コマンドを入力し、新しいlaravelアプリを作成します。
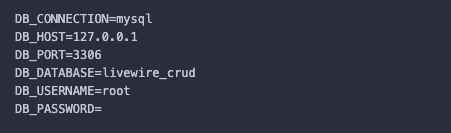
composer create-project --prefer-dist laravel/laravel laravel_livewire_crud.envでデータベースの詳細を追加する
Modelファイル、Migrationファイルの作成
php artisan make:model Student -m例え:
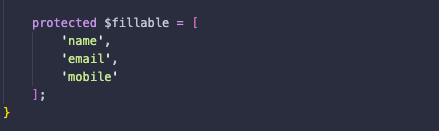
app/Models/Student.phpファイルに$fillable配列を追加し、名前、メール、携帯電話などのテーブルの値を追加します。
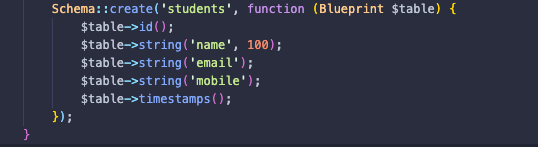
また、学生用のmigrationテーブルを設定する必要があります。
LivewireとJetstreamのパッケージのインストール
composer require laravel/jetstreamphp artisan jetstream:install livewireさらに、アセットをコンパイルする必要があるので、両方のnpmコマンドを同時に使用して、ビルドコンパイルタスクを完了させます。
npm install && npm run dev最後に、php artisanコマンドを使用して移行を実行します。
php artisan migrateLivewireのcrudコンポーネントを生成するため
php artisan make:livewire crud
上記のコマンドを実行すると、2つのファイルが生成されました。
ルートの作成
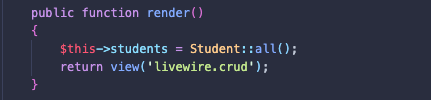
Route::get('students', Crud::class);最初のページに生徒のリストを表示したいので、render関数で全生徒のデータを取得します。
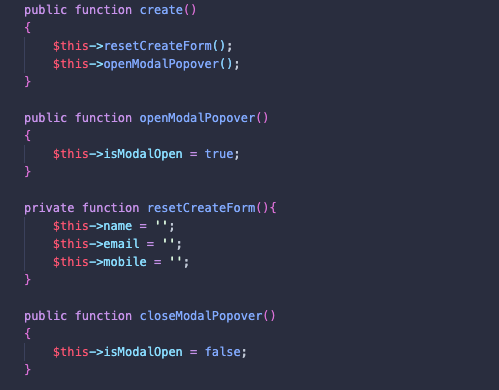
生徒を作成するため、
ボタンに wire:click=”create()” というアクションを追加します。
<button wire:click="create()"
                class="my-4 inline-flex justify-center w-full rounded-md border border-transparent px-4 py-2 bg-red-600 text-base font-bold text-white shadow-sm hover:bg-red-700">
                Create Student
 </button>
学生の作成をモデルフォームとしてデザインしたいので、いくつか条件を追加します。True を指定するとモデルボックスが開き、False を指定するとモデルボックスが閉じます。
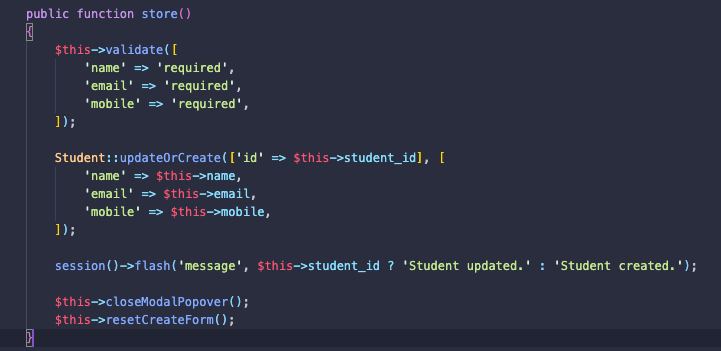
生徒を保存するため、
ボタンに wire:click.prevent=”store()” というアクションを追加します。
<button wire:click.prevent="store()"  type="button"
                            class="inline-flex justify-center w-full rounded-md border border-transparent px-4 py-2 bg-red-600 text-base
                            leading-6 font-bold text-white shadow-sm hover:bg-red-700 focus:outline-none
                            focus:border-green-700 focus:shadow-outline-green transition ease-in-out duration-150 sm:text-sm sm:leading-5">
                            Store
</button>
updateOrCreateを使用して、保存と更新の両方の関数を作成することにします。
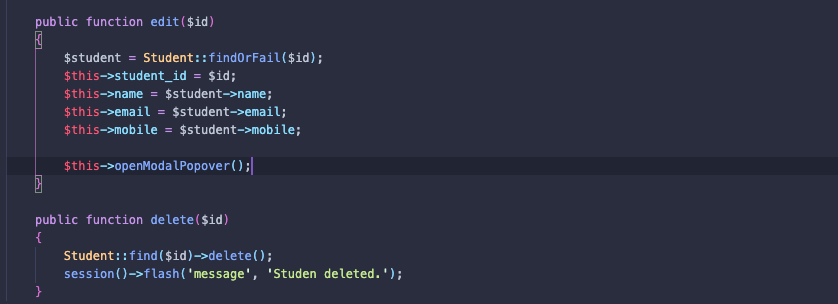
学生の編集を行うには
ボタンに wire:click=”edit({{ $student->id }})” というアクションを追加します。
後学生の削除を行うには
ボタンに wire:click=”delete({{ $student->id }})” というアクションを追加します。
<button wire:click="edit({{ $student->id }})"
                                class="flex px-4 py-2 bg-gray-500 text-gray-900 cursor-pointer">Edit</button>
<button wire:click="delete({{ $student->id }})"
                                class="flex px-4 py-2 bg-red-100 text-gray-900 cursor-pointer">Delete</button>
編集と削除を行うために、生徒のデータを取得して、削除機能は生徒のデータを削除します。
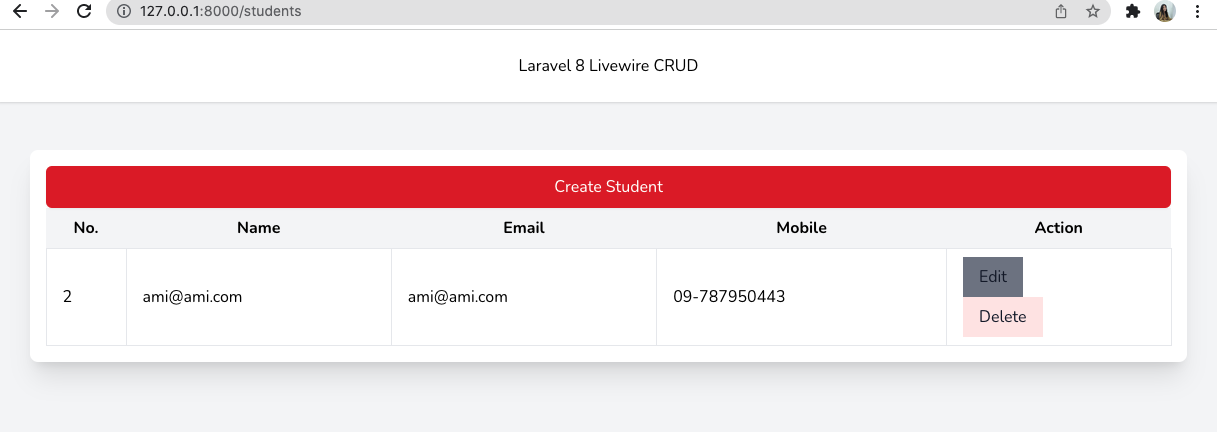
その結果は
学生一覧
学生を作るために
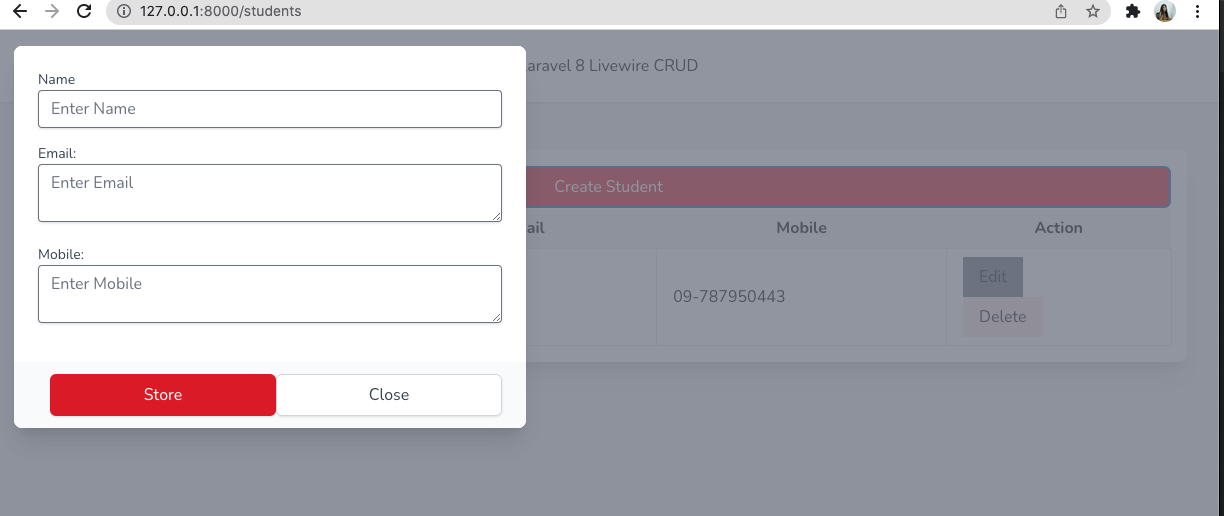
学生を編集するには

最後までお読みいただき、ありがとうございました。
By Ami
asahi at 2022年01月07日 10:00:00
Unity ドロップダウンUIの使用方法
nishida at 2022年01月06日 10:00:00
- 2022年1月06日
- 未分類
5 Website To Help You Create Beautiful JavaScript Code Snippets For Your Medium Articles
While writing technical development articles you will often show some code blocks. You can either take a screenshot of your favorite IDE while it shows the code or you can use the simple Medium code formatting by pressing ```. But instead of using any of those two approaches, I would suggest using any or all of the websites presented within this article.
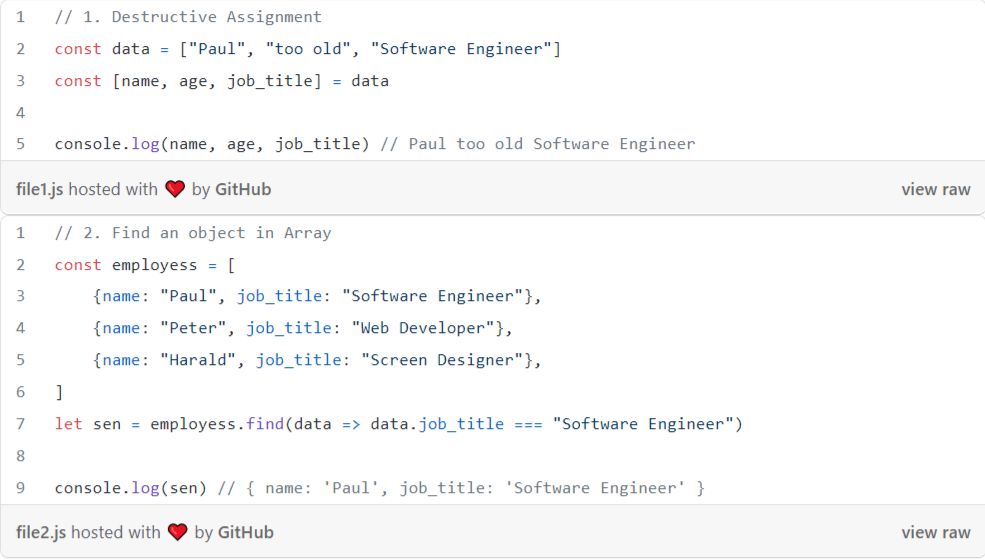
1. GitHub Gists
The main website to create code blocks is GitHub Gists. You can simply go to https://gist.github.com and add your code into the Gist. Also, you can add multiple files to one single Gist and use them independently in your article.
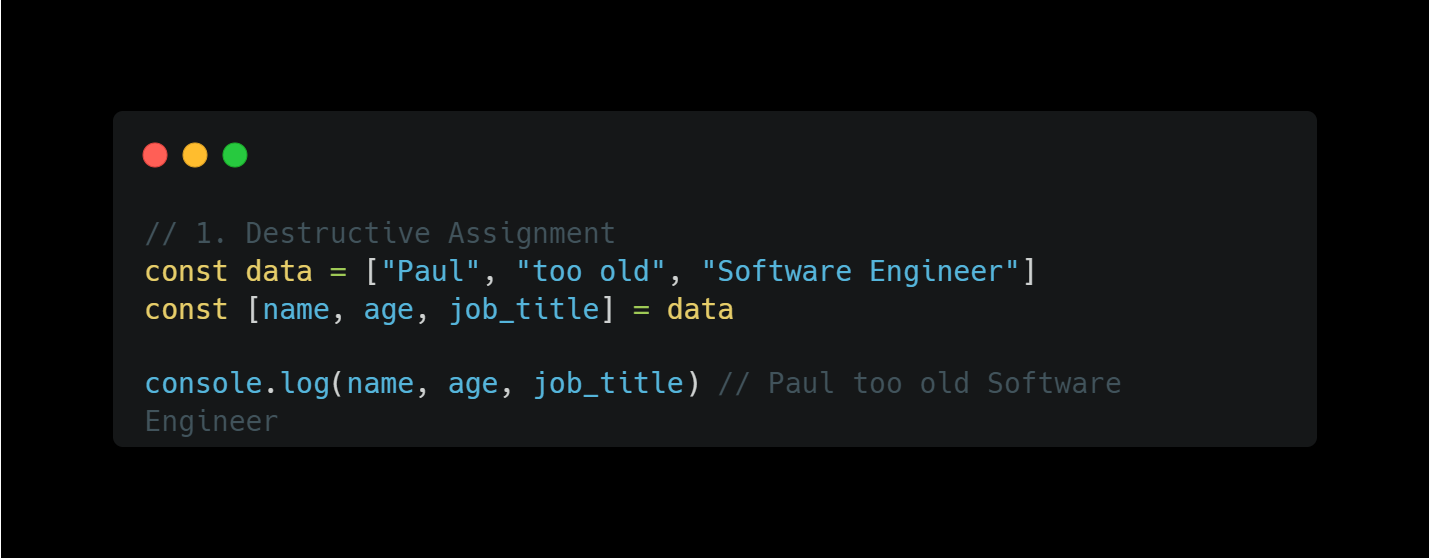
2. carbon.now.sh
This website is really simple. You can log in with your GitHub profile and start creating snippets. Go to and insert your code. It will be automatically saved into your profile and can be accessed by the URL.
As an example, https://carbon.now.sh/XHGvwhmthQjAZLJAWNoA
The content will look like this in Medium:
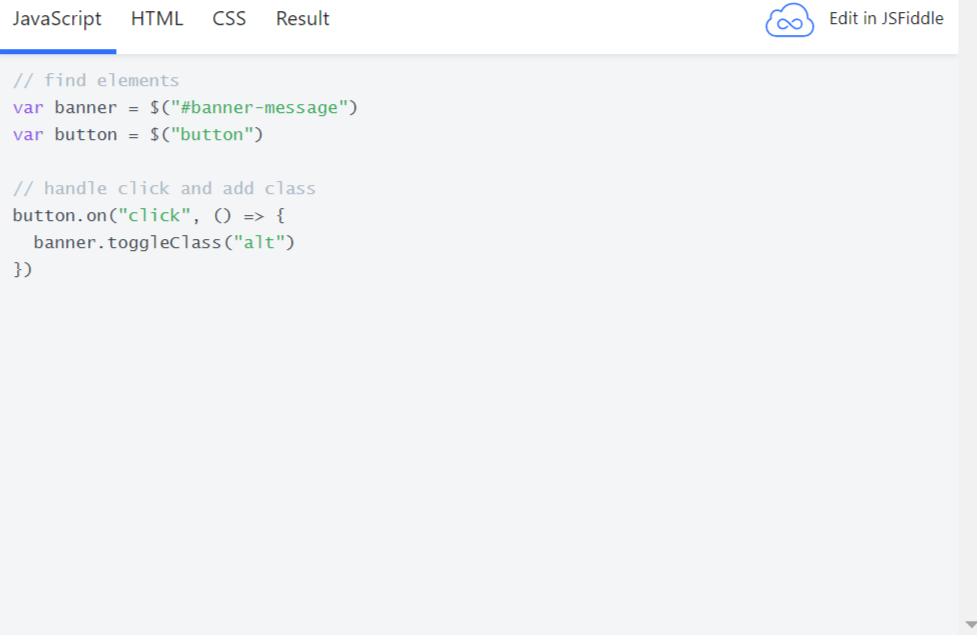
3. JSFiddle
JSFiddle is a famous javascript code playground where you can test your HTML, CSS, and JS in the browser.
Additionally, these code blocks can be imported into Medium as an embed. Within Medium you will have one block with a tab menu that can be switched.
I use this fiddle as an example: https://jsfiddle.net/paulknulst/odLg3qu1/
As you can see you can switch between JavaScript, HTML, CSS, and Result. Within Result, you can see the outcome after the three “files” are combined and run by jsfiddle.net.
4. Codepen.io
Codepen is comparable to JSFiddle. You can also add HTML, CSS, and JS and import them into Medium.
I use this as an example: https://codepen.io/paulknulst/pen/NWaXwdW
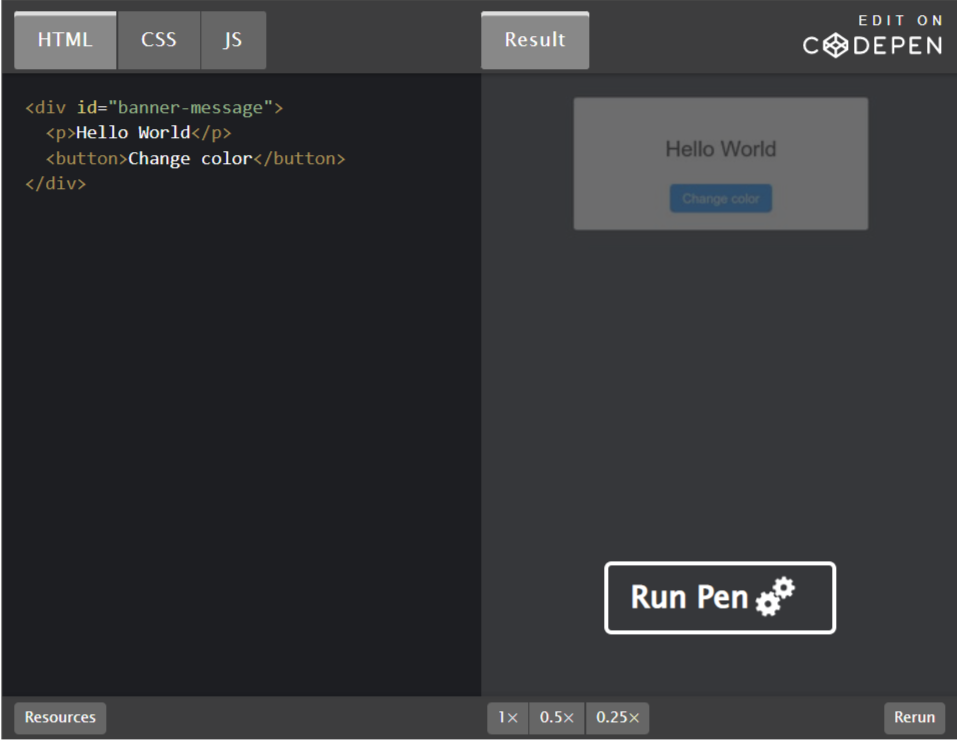
As you can see you can switch between JavaScript, HTML, CSS, and Result. It looks different from JSFiddle but contains the same information.
5. Codesandbox.io
With Codesandbox.io you are able to create complete sandboxes for your project that will run within the browser.
If you start with this website you can choose a sample sandbox from a list of predefined sandboxes
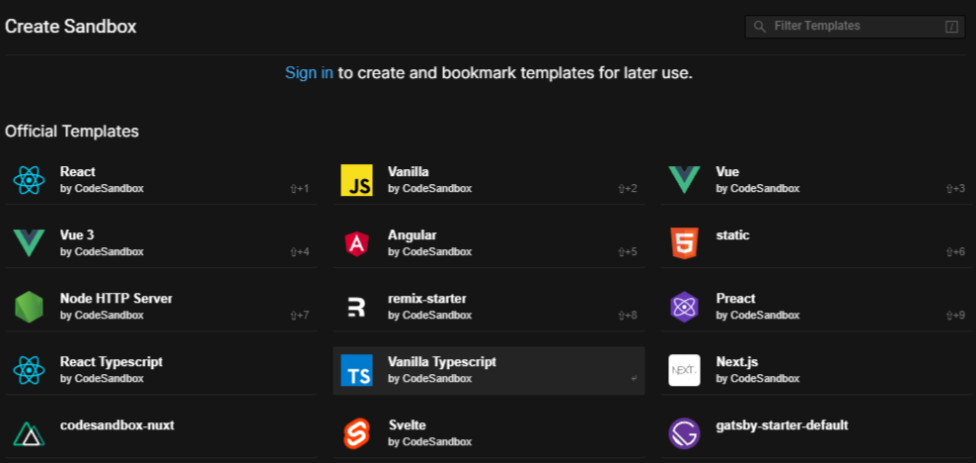
After you choose your template all needed files will be created and you can change them in the integrated IDE and see the result in an embedded browser window.
I really hope you find this article helpful and can use any of the websites in your development articles.
Tsuki
tsuki at 2022年01月06日 10:00:00
 大人が楽しめるヒーリング絵本河童のカパと静かな森
 パワースポット 日本三大神滝布引の滝
 佐藤・広幸ドイツ魂
 Himeji Castle姫路城
 ボイドタイムお知らせアプリVoid Time 〜月を無視できない〜
 撮った写真をカレンダーに撮りカレ