アプリ関連ニュース
- 2022年5月17日
- 技術情報
Converting XML to Array with PHP
Today, I would like to share about converting xml data to associated array in PHP. Let’s take a look.
We will need just 4 steps to perform that.
Step 1 : read the xml file and get file contents.
<?php
// read xml file
$xmlFile = "sample.xml";
$xmlFileContents = file_get_contents($xmlFile);
Step 2 : convert xml data into xml object.
// Convert XML Data into XML Object
$xmlObject = simplexml_load_string($xmlFileContents);
Step 3 : convert xml object to Associated array
// Convert XML data object to  Array
$json  = json_encode($xmlObject);
$array = json_decode($json, true);
Step 4 : print the result
// print array
print "<pre>";
print_r($array);
print "</pre>";
This is all for now. Hope you enjoy that.
By Asahi
waithaw at 2022年05月17日 10:00:00
- 2022年5月16日
- 技術情報
Deleting a Git branch locally and remotely
You may have accidentally created a local branch or a remote branch on your local machine or remote host, respectively. In other cases, you may simply want to delete the local or remote branch.
Delete the local branch
To delete a local Git branch, you need to specify the –delete or -d flag in your git branch command (the latter is just an alias for –delete).
$ git branch --delete local-branchOr you can also use like this
$ git branch -d local-branchAs for force deleting , you can use like this
$ git branch -D my-local-branch-nameDelete a Remote Branch
You can delete a remote branch using as below.
$git push origin --delete remote-branchNow, once the remote branch is removed from the remote host, you need to make sure that the other machines are also in sync. The branch has been removed from both the local machine and the remote host, but other machines may still have the old tracking branch. This can be listed by running git branch -a.
To ensure that all machines are in-sync, you need to run
$git fetch --all --pruneYuuma
yuuma at 2022年05月16日 10:00:00
- 2022年5月13日
- 技術情報
知っておいていただきたいこと – 4
今回も、Laravelの知っておいた方がいいとおもったことをいくつか紹介します。
Laravel Tip
ここでは、クエリを少し読みやすくするための小さな工夫を紹介します。あるオブジェクトに「属している」レコードを問い合わせる際には、 ‘whereBelongsTo’ メソッドを使用します。
$article = Article::where('user_id', $user->id)->paginate(10);

//After

$article = Article::whereBelongsTo($user)->paginate(10);
ということで、今回はこれで終わります。
金曜担当 – Ami
asahi at 2022年05月13日 10:00:00
- 2022年5月12日
- 技術情報
aws ec2環境でphpアップロードファイルのサイズ上限を変更する
nishida at 2022年05月12日 10:00:00
Encrypt and Decrypt files with GPG in linux
Today, I would like to share about encrypting and decrypting files with GPG in linux. Let’s take a look.
GPG, known as GNU Privacy Guard (GnuPG), is an open-source command-line tool to encrypt things like files, emails, messages and so on.
Installation
GPG usually pre-installed with most of the Linux Distributions. But just in case, you can install by the following command in terminal.
sudo apt install gnupg
Usage
Generate keys
To encrypt files, you need to generate a GPG key on the system firstly.
gpg –full-generate-key
If the options to select are asked, you can read and use default values by pressing Enter.
But you will need to fill name and email.
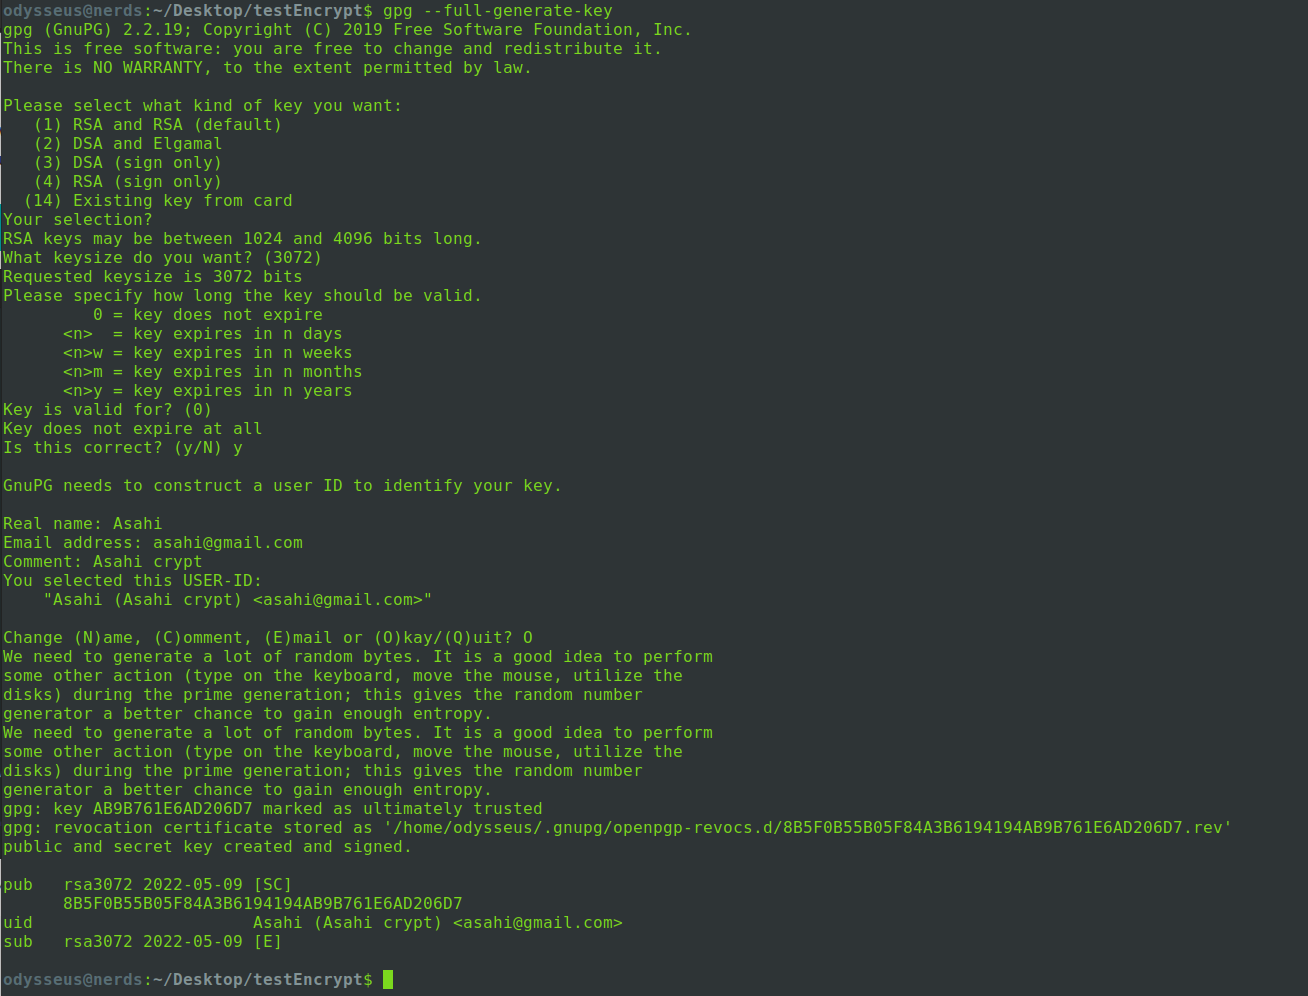
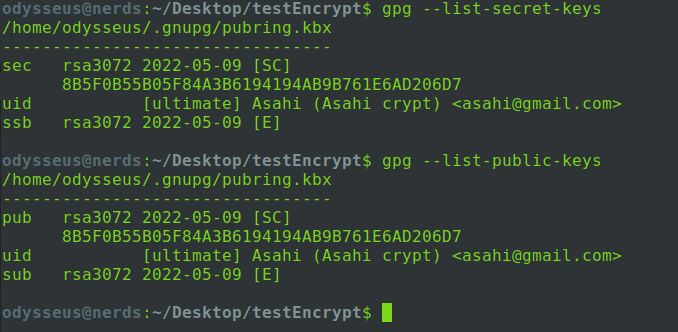
Checking GPG keys
You can also check your key lists as follows.
Encrypting a file
Firstly, let’s create a sample text file with some text.

And let’s encrypt a file by the following command.

The recipient argument is the email you wrote when creating key.
The above command output the encrypted file with .gpg extension. You can delete original file after encryption.

And we can see the contents of the encrypted file as follow.

Decrypting a file
You can decrypt an encrypted gpg file by the following command.

This command outputs a decrypted file named decrypted_test.txt. Now you can see correct text contents of the file.
So this is all for now and for more details, I recommend to read here.
Hope you enjoy that.
By Asahi
waithaw at 2022年05月10日 10:00:00
 大人が楽しめるヒーリング絵本河童のカパと静かな森
 パワースポット 日本三大神滝布引の滝
 佐藤・広幸ドイツ魂
 Himeji Castle姫路城
 ボイドタイムお知らせアプリVoid Time 〜月を無視できない〜
 撮った写真をカレンダーに撮りカレ