技術情報
- 2022年07月05日
- 技術情報
Some Key Differences between Laravel & Symfony
Today, I would like to share about some key differences between Laravel and Symfony. Lets’ take a look.
Laravel and Symfony are both popular PHP frameworks. They have a lot in common. But some are different. For differences, first of all is directory structure. Their directory structure are different.
CLI Tool
Laravel has php artisan cli tool whereas Symfony has php bin/console
Code base type
Laravel provides usage of Facades and helper functions whereas Symfony relys more on concept of Dependency Injection.
ORM
Default ORM of Laravel is Eloquent. Symfony’s default is Doctrine.
Template Engine
Laravel’s default template engine is blade whereas Symfony’s one is Twig.
Performance
If about performances, the measurements vary depending on many facts. But most voting for app speed are got by Laravel. However, Symfony is also known for its optimization and easy long-term maintenance.
Internationalization
Laravel supports only PHP and JSON whereas Symfony can use several formats such as PHP, XLIFF, .po mo and so on.
This is all for now. Hope you enjoy that.
By Asahi
waithaw at 2022年07月05日 10:00:00
- 2022年07月04日
- 技術情報
Google Hangouts is shutting down
The web giant, Google announced that they will shut down its messaging app Hangouts before it officially shuts down in November.
Mobile app users will see an alert asking them to move their conversation to Google Chat. Google Chat is another online service. It can be accessed via Gmail and its own standalone application. Next month, conversations in the web version of Hangout will be ported to Gmail chat.
Google have been integrating these services into one platform for Gmail users, from Google Chat to Google Docs to Meet. These are also services available for corporate clients like Google Workspace, which supports accounts with personalized email addresses and cloud computing capabilities.
Google Hangouts was designed as a cross-platform instant messaging application for Google+, a currently non-functional social networking platform. In 2013, it became another app but it didn’t get any visible boost compared to alternative apps like WhatsApp, Facebook Messenger, Telegram.
Google started moving Workspace customers from Hangouts to Meet and Chat in 2020. Gmail users were also asked to migrate last year before Hangout was abolished altogether. Chat will become Google’s leading messaging platform in the future. Google said it will integrate more features, allowing users to make direct calls, start online threads in Spaces, and share and view multiple images.
Yuuma
yuuma at 2022年07月04日 10:00:00
- 2022年07月01日
- 技術情報
知っておいていただきたいこと – 9
今回も、Laravelの知っておいた方がいいとおもったことをいくつか紹介します。
LaravelのBladeディレクティブ@.classと変数$loopの組み合わせ
foreachループで反復している間、ループの内部で$loop変数が利用可能になりました。この変数からには、ループの繰り返しが奇数か偶数かなど、便利な情報にアクセスできます。
もう便利な情報があるので、Laravelのloop変数部分 で確認することができます。
@foreach($items as $item)
     <article @class([
            'bg-green'  => $loop->even,
            'black'     => $loop->odd,
        ])>
      </article>
@endforeach
ということで、今回はこれで終わります。
金曜担当 – Ami
asahi at 2022年07月01日 10:00:00
- 2022年06月28日
- 技術情報
How to create a custom event in Node js
Today, I would like to share about creating a custom event in Node js. Let’s take a look.
In Node js, there is a built-in module named ‘events’. With this module, you can create a custom event and bind the custom event process function with the event. Let’s write some codes.
1. include ‘events’ module
let events = require(‘events’);2. create an EventEmitter object
let eventEmitter = new events.EventEmitter();3. create a function that will be triggerd as a callback function when the event happens
let connection_start_handler = () => {
    console.log('Connection started')
}
4. register the event with the callback function.
eventEmitter.on('connection_start', connection_start_handler);5. Trigger the event. This will execute the callback function connection_start_handler().
eventEmitter.emit('connection_start')Then we create a file with the above code and run with the following command to see output.
$ node custom_event.jsThe output is
Connection started.This is all for now. Hope you enjoy that.
By Asahi
waithaw at 2022年06月28日 10:00:00
- 2022年06月27日
- 技術情報
Hoppscotch, Postman alternative
Hoppscotch is a tool that makes it easy to use the API. This is an HTTP client that you can use to make HTTP requests using the GUI and validate the responses obtained using these API requests.
https://twitter.com/hoppscotch_io/status/1483301221167362048?ref_src=twsrc%5Etfw%7Ctwcamp%5Etweetembed%7Ctwterm%5E1483301221167362048%7Ctwgr%5E%7Ctwcon%5Es1_c10&ref_url=https%3A%2F%2Fpublish.twitter.com%2F%3Fquery%3Dhttps3A2F2Ftwitter.com2Fhoppscotch_io2Fstatus2F1483301221167362048widget%3DTweet
You can test directly here. If you already know about Postman and it’s usage, this will not be so difficult for you to get started.
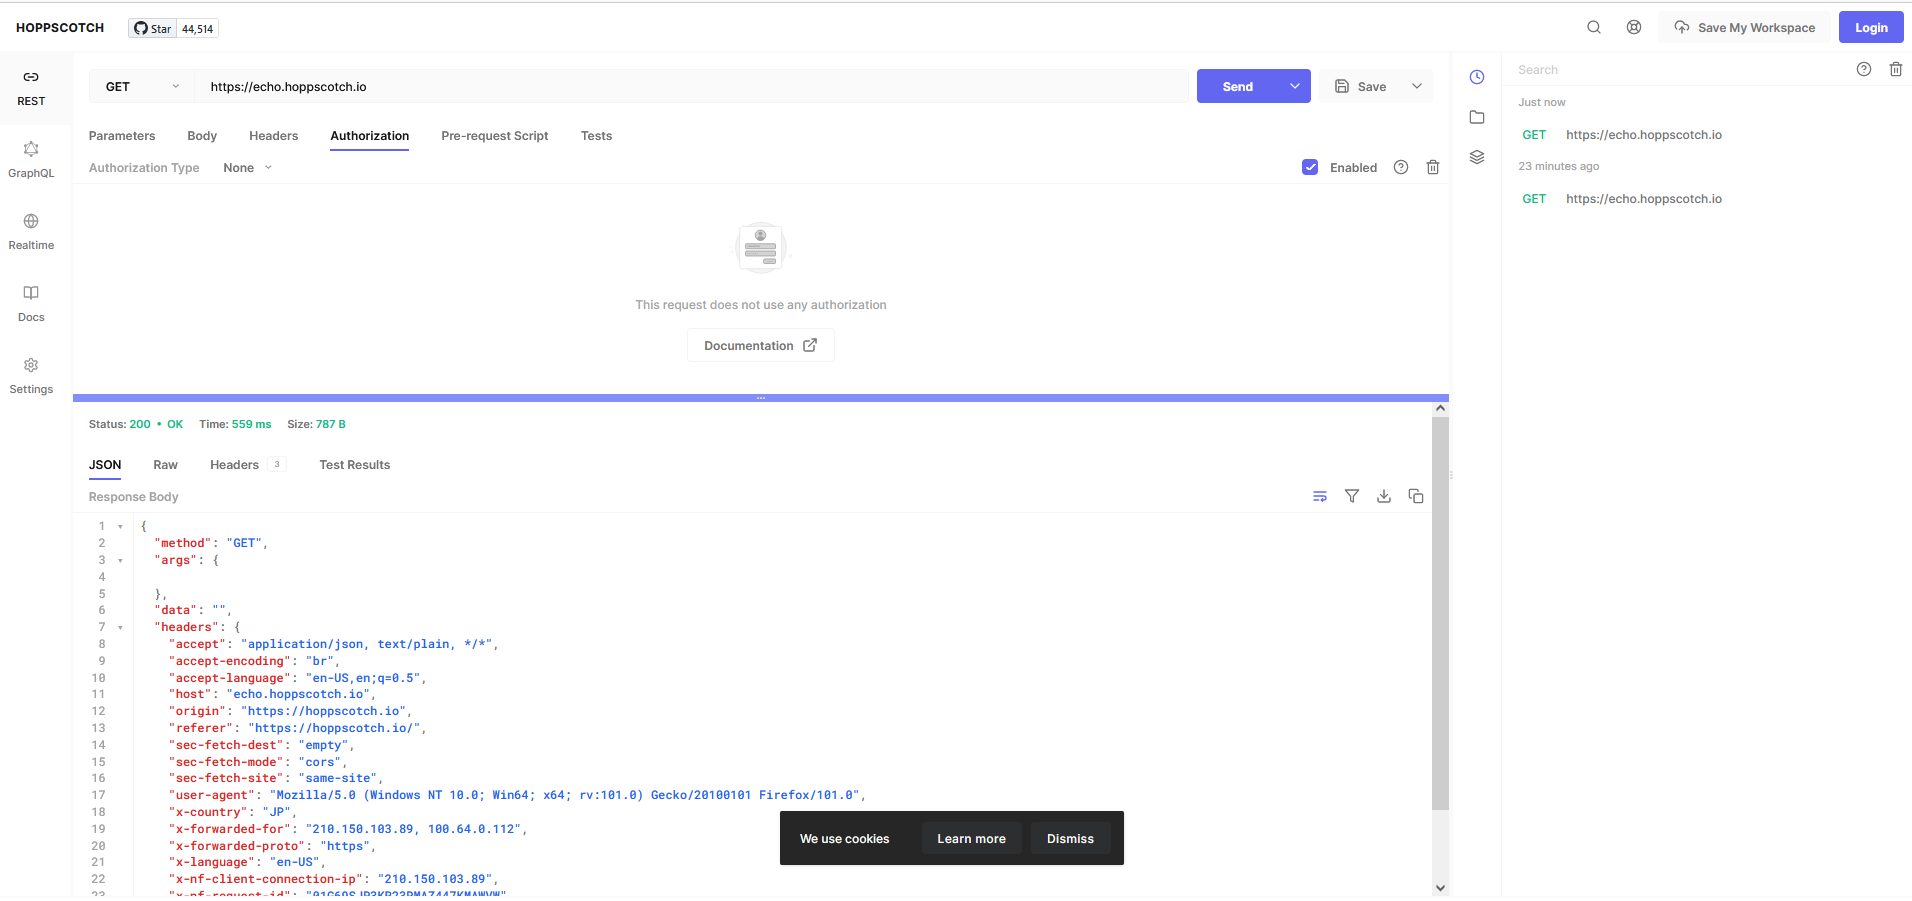
In fact, I really like is minimalist UI design and it’s really convenient they separate for different type of requests. For example, you can see Rest, GraphQL, Web socket and etc.
You can find more detail here.
Yuuma
yuuma at 2022年06月27日 10:00:00
 大人が楽しめるヒーリング絵本河童のカパと静かな森
 パワースポット 日本三大神滝布引の滝
 佐藤・広幸ドイツ魂
 Himeji Castle姫路城
 ボイドタイムお知らせアプリVoid Time 〜月を無視できない〜
 撮った写真をカレンダーに撮りカレ