アプリ関連ニュース
- 2022年6月28日
- 技術情報
How to create a custom event in Node js
Today, I would like to share about creating a custom event in Node js. Let’s take a look.
In Node js, there is a built-in module named ‘events’. With this module, you can create a custom event and bind the custom event process function with the event. Let’s write some codes.
1. include ‘events’ module
let events = require(‘events’);2. create an EventEmitter object
let eventEmitter = new events.EventEmitter();3. create a function that will be triggerd as a callback function when the event happens
let connection_start_handler = () => {
    console.log('Connection started')
}
4. register the event with the callback function.
eventEmitter.on('connection_start', connection_start_handler);5. Trigger the event. This will execute the callback function connection_start_handler().
eventEmitter.emit('connection_start')Then we create a file with the above code and run with the following command to see output.
$ node custom_event.jsThe output is
Connection started.This is all for now. Hope you enjoy that.
By Asahi
waithaw at 2022年06月28日 10:00:00
- 2022年6月27日
- 技術情報
Hoppscotch, Postman alternative
Hoppscotch is a tool that makes it easy to use the API. This is an HTTP client that you can use to make HTTP requests using the GUI and validate the responses obtained using these API requests.
https://twitter.com/hoppscotch_io/status/1483301221167362048?ref_src=twsrc%5Etfw%7Ctwcamp%5Etweetembed%7Ctwterm%5E1483301221167362048%7Ctwgr%5E%7Ctwcon%5Es1_c10&ref_url=https%3A%2F%2Fpublish.twitter.com%2F%3Fquery%3Dhttps3A2F2Ftwitter.com2Fhoppscotch_io2Fstatus2F1483301221167362048widget%3DTweet
You can test directly here. If you already know about Postman and it’s usage, this will not be so difficult for you to get started.
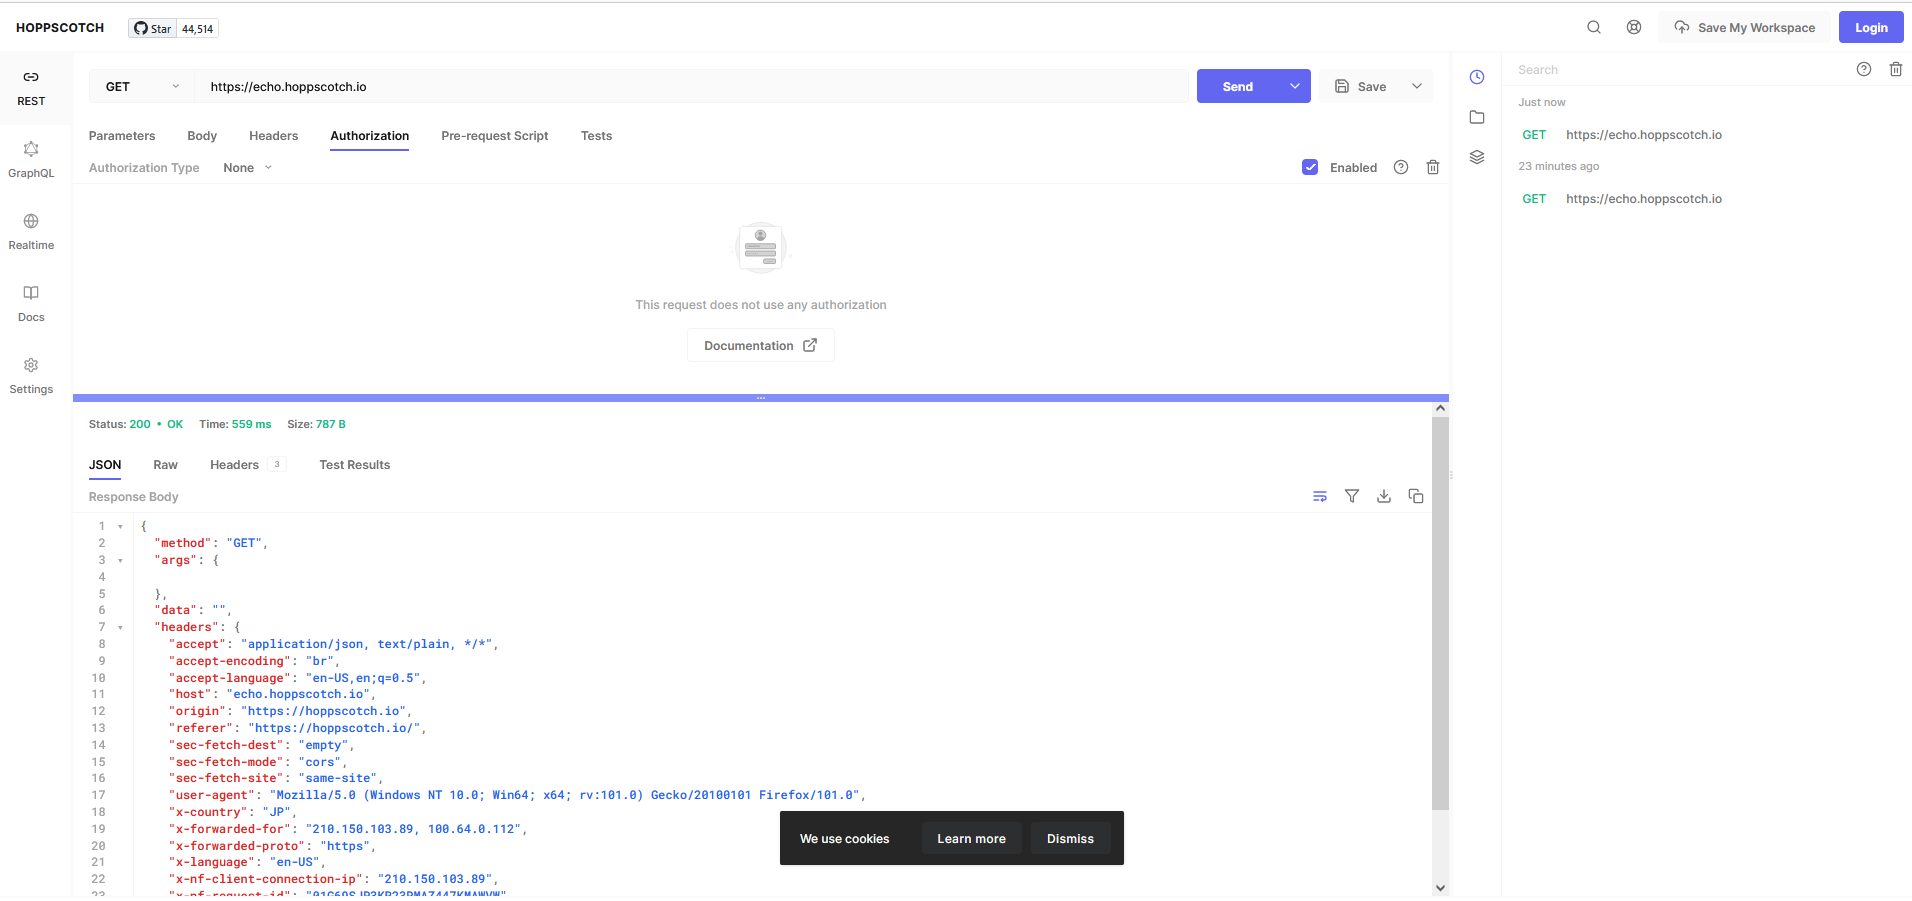
In fact, I really like is minimalist UI design and it’s really convenient they separate for different type of requests. For example, you can see Rest, GraphQL, Web socket and etc.
You can find more detail here.
Yuuma
yuuma at 2022年06月27日 10:00:00
- 2022年6月24日
- 技術情報
Flutter でWeb_viewを対応するには?
今回はFlutterの使い方を共有したいと思い、記事書きました。
タイトルで書いた通り、Web_viewを利用するにはpubspec.yamlで導入する必要があります。
dependencies:
  webview_flutter: ^3.0.4
Android開発の場合、「android > app > build.gradle」で、SDKの最小バージョンを19以上にします。
defaultConfig {
  applicationId "com.example.sample_app"
  minSdkVersion 21
  targetSdkVersion 31
  versionCode flutterVersionCode.toInteger()
  versionName flutterVersionName
}
initialURL に表示したいurlを書きます。
拡大を有効にしたいなら、「zoomEnabled」に「true」を指定します。
WebView(
    initialUrl: 'https://flutter.dev',
    zoomEnabled: true,
)
Webページのローディング開始時、ローディングをひょうじしたいなら、
onPageStarted: (url) {
   setState(() {
      _isLoading = true;
    });
},
Webページが既に表示された時、ローディングをひょうじを終わり処理
onPageFinished: (url) {
   setState(() {
      _isLoading = false;
    });
},
ということで、今回はこれで終わります。
金曜担当 – Ami
asahi at 2022年06月24日 10:00:00
- 2022年6月21日
- 技術情報
5 Most Useful Node.js monitoring tools
Today, I would like to share about 5 most useful Node JS monitoring tools. Let’s take a look.
App Metrics
App Metrics is an open-source project developed and serviced by IBM. It has an application dashboard that indicates the performance metrics of running Node.js application.
Retrace
Retrace is an application performance management tool and it ensures apps are performing and meeting the needs for which they were expected. It supports PHP, Ruby, Node.js, Python, Java, and .NET applications.
PM2
PM2 allows us to run NodeJs apps much easier. It will let apps run in cluster mode. One of PM2’s top features is web interface integration for application health monitoring. Other features are application and error log management, hot-reload, log streaming, and auto-clustering.
AppSignal
AppSignal is great in performance monitoring and error tracking to the Node.js applications. It supports JavaScript applications, TypeScript applications, and several frameworks.
Express Status Monitor
Express Status monitor is an open-source tool that monitors Express.js, which is one of the most popular framework used in Node.js. It is possible to regulate response times, request frequency, status code, average overload, and CPU utilization.
This is all for now. Hope you enjoy that.
By Asahi
waithaw at 2022年06月21日 10:00:00
- 2022年6月20日
- 技術情報
Git fatal: early EOF
When I was trying to clone a repository from a remote server, I got this error fatal: early EOF fatal: index-pack failed. Normally this problem happens when the remote repository is too large and let me share with you today how I solved this issue.
You can see the full error log in below screenshot.

There are some ways to solve this issue.
If you are the owner the repository, you can configure some settings like
git gc
git gc will also perform compression on stored Git Objects, freeing up precious disk space. For more detail, you can reference here.
git repack ...
This used to combine all objects that do not currently reside in a “pack”, into a pack. It can also be used to re-organize existing packs into a single, more efficient pack. Packs are used to reduce the load on mirror systems, backup engines, disk storage, etc. Please reference more here.
If you are not the owner of the repository just a client, you still can configure post buffer setting and git depth setting like below.
//updating the post buffer setting
git config --global http.postBuffer 524288000
//cloning using depth
git clone --depth 1 <repo_url>Depth is a feature of git to reduce server load. Instead of cloning the complete repository (as usually done with git), using clone depth just clones the last clone-depth-number revisions of your repository, also called shallow clone.
Yuuma
yuuma at 2022年06月20日 10:00:00
 大人が楽しめるヒーリング絵本河童のカパと静かな森
 パワースポット 日本三大神滝布引の滝
 佐藤・広幸ドイツ魂
 Himeji Castle姫路城
 ボイドタイムお知らせアプリVoid Time 〜月を無視できない〜
 撮った写真をカレンダーに撮りカレ