アプリ関連ニュース
- 2022年11月14日
- 技術情報
Hey, GitHub
GitHub, owned by Microsoft, is experimenting with a new voice-based dialogue system for Copilot software. “Hello, GitHub!” Let programmers code without keyboards, just with their voice.
The new experiment will be available in Copilot, a $10/month AI tool GitHub released earlier this year to help developers code. Copilot suggests lines of code to the developer within the code editor, and can suggest the next line of code when the developer writes in an integrated development environment (IDE) such as Visual Studio Code, Neovim, or JetBrains IDE. Copilot can even suggest complete methods and complex algorithms along with boilerplate code to help with unit testing.
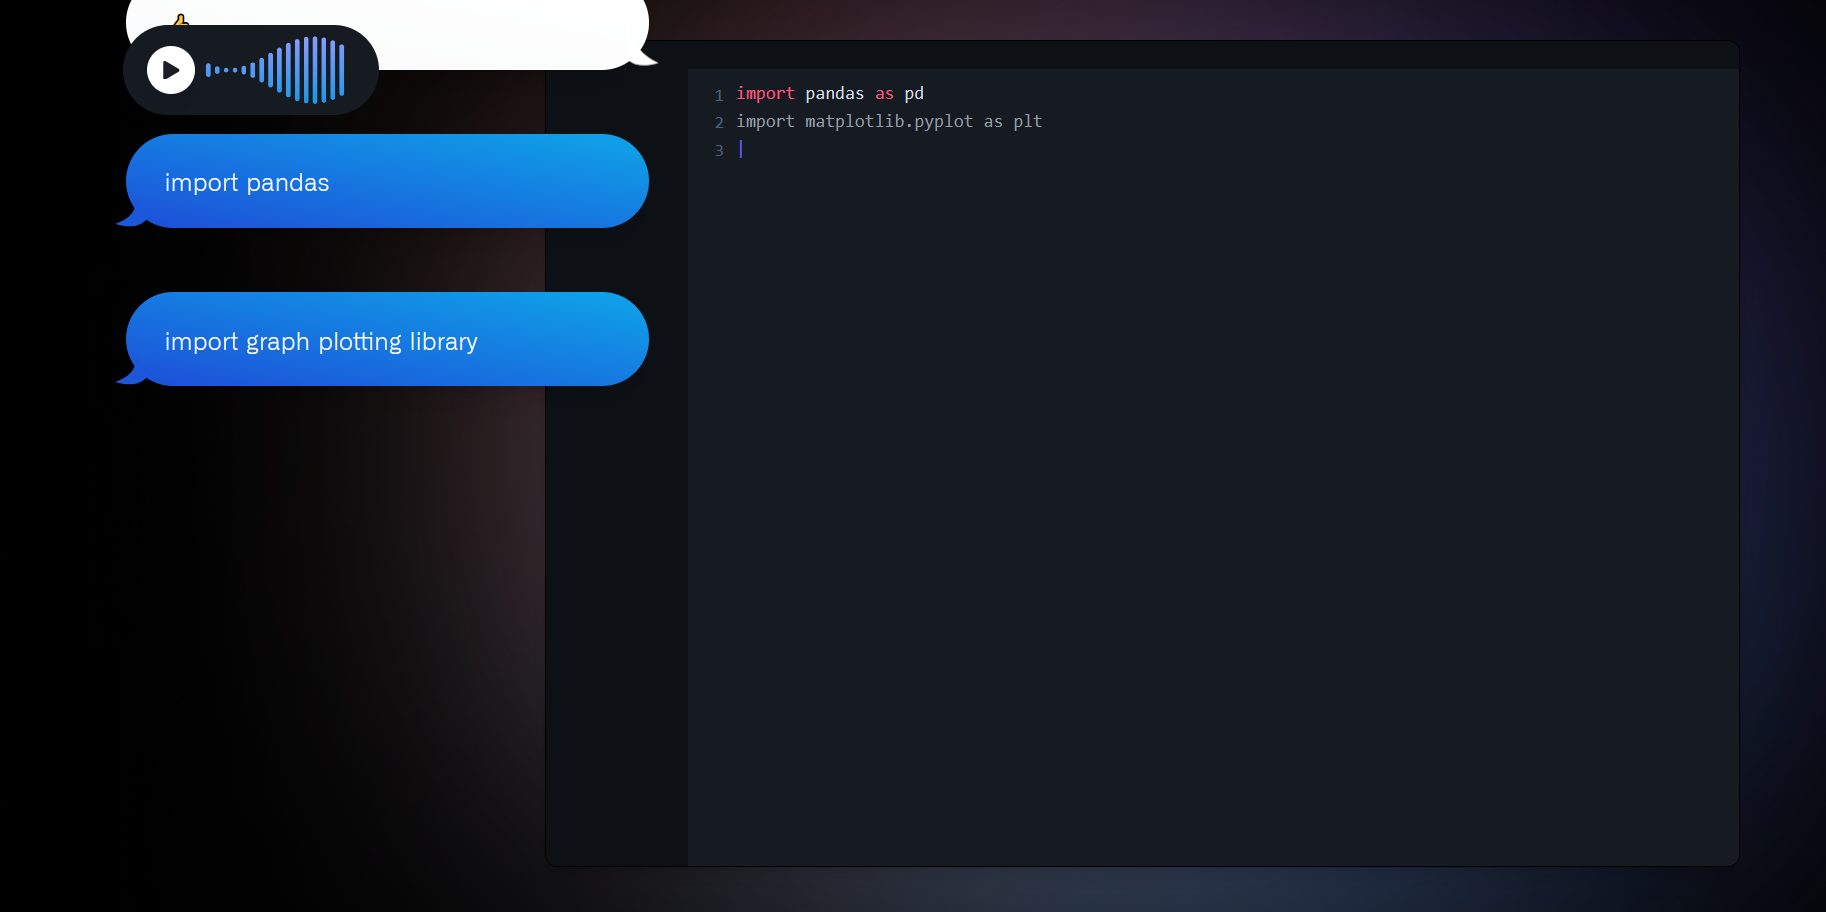
Adding voice coding is especially useful in accessibility scenarios. He can ask Copilot to do things like move to another line of code, or just use his voice to move to a method or block. You can also control Visual Studio Code with commands like “run program” and “toggle zen mode”. You can also request a code overview if you want an overview of how the code works.
This new voice system is being developed by GitHub Next, a team of researchers and engineers “investigating the future of software development.” There’s no guarantee it will eventually be released as a full product.
You can learn more about Hey Github here.
Yuuma
yuuma at 2022年11月14日 10:00:00
- 2022年11月11日
- 技術情報
Flutterでタブバーウィジェットを追加する方法
FlutterのTabBarとTabBarViewを使って、タブバーウィジェットを追加する方法を紹介します。
まずはTabBarとTabBarViewを使う前に,DefaultTabController()でウィジェットツリーをラップしておきます.
DefaultTabController(
  initialIndex: 1,
  length:3,
  child:Scaffold(

  )
)
initialIndexのところで開始するIndexを変更することができます。
initialIndex: 0, アプリ内でタブを表示したい場所にTabBar()を配置します。今の例では、AppBarの下で配置しています。
AppBar(

   bottom: TabBar(
      tabs: [
         Tab(text: "Home",),
         Tab(text: "About Us",),
         Tab(text: "Contact Us",)
         ]
        ),
      ),
次に、コンテンツを表示したい場所にTabBarView()を配置します。
TabBarView(
    children: [
        Container(
            height: 400,
            color: Colors.red,
        ),
        Container(
            height: 400,
            color: Colors.green,
        ),
        Container(
          height: 400,
            color: Colors.white,
        )
    ]
)
金曜担当 – Ami
asahi at 2022年11月11日 10:00:00
- 2022年11月08日
- 技術情報
A bash script to clean RAM cache and Swap
Today, I would like to share a bash script to clean RAM cache and Swap. Let’s take a look at the following script.
echo 3 >'/proc/sys/vm/drop_caches' && swapoff -a && swapon -a && printf '\n%s\n' 'Cleared Ram-cache and Swap'Save the above codes as a file with .sh extension.
And give an execution permission to that file. Then you can clean RAM cache and swap by running that file.
Hope you enjoy that.
By Asahi
waithaw at 2022年11月08日 10:00:00
- 2022年11月07日
- 技術情報
Sanitizing and formatting data with the Transformer PHP package
Transformer is a PHP package for sanitizing and formatting data powered by Laravel’s validation components. The package uses a familiar Laravel validation-like syntax to transform data using classes, callable functions and etc.
Here is a quick sample.
$input = [
  'name' => '  yuuma  ',
  'phone_number' => '123-4567-7891',
  'date_of_birth' => "1998-04-12",
];

(new DataTransformer($input, [
    'name' => 'trim|ucfirst',
    'phone_number' => 'only_numbers',
    'date_of_birth' => 'to_carbon|->format:m/d/y',
]))->transform();

// Returns:
// [
//     "name" => "Yuuma",
//     "phone_number" => "12345677891",
//     "date_of_birth" => "04/12/98",
// ]
Data can also be transformed using closures or classes that implement the provided Transformable interface. Additionally, this package supports nested array data using dot notation, wildcard input (applying functions to keys matching a wildcard pattern), and more.
Learn more about this package, get full installation instructions, and view the source code on GitHub.
Yuuma
yuuma at 2022年11月07日 10:00:00
- 2022年11月01日
- 技術情報
Log Viewer library for Laravel
Today, I would like to share just a library for viewing logs in Laravel. Let’s take a look.
The library’s name is Log Viewer. This library is very cool to see Laravel log entries clearly and quickly. And you can also search and filter the logs, and each log entry is shareable links.
I’m sure that this library make developers efficient to work for debugging or something like using log files.
You can check out for more details here.
This is all for now. Hope you enjoy that.
By Asahi
waithaw at 2022年11月01日 10:00:00
 大人が楽しめるヒーリング絵本河童のカパと静かな森
 パワースポット 日本三大神滝布引の滝
 佐藤・広幸ドイツ魂
 Himeji Castle姫路城
 ボイドタイムお知らせアプリVoid Time 〜月を無視できない〜
 撮った写真をカレンダーに撮りカレ