技術情報
- 2021年07月08日
- 技術情報, Web Service
sourcetree/githubでの認証エラーの対処方法
nishida at 2021年07月08日 10:00:48
- 2021年07月05日
- Web Service
A touch to serverless framework – part 3
I wrote about setting up our severless project and deploying to the AWS last week. Today I will talk about invoking our functions and creating endpoints as I mentioned before. So lets get straight to it.
Function Invoking
Lets invoke our function which means execution of the serverless function. In invoking function, we can invoke either locally or cloud way.
Invoking locally
Go to your project root directory and run this command which invoke our function locally before submitting to the cloud.
sls invoke local --function helloThis will call to hello function and give a response like this.

Invoking Cloud (Cloud execution)
sls invoke --function helloThis will also invoke our function but not from our local code. This will hit our function hello from the cloud and give us a response.

Creating Endpoints
Lets create a simple endpoints first before we tweak a bit more later. Remember the endpoint will be hit up when a specific event will come up which is the main concept of serverless (Event). So if we want to create an endpoint , we also need to create an event.
Go to serverless.yml and find the functions parts and we will add an event and endpoint like this. Please be careful about the indentations as the yml file is sensitive.
functions:
  hello:
    handler: handler.hello
    events:
      - http:
          path: sample-endpoint
          method: GET
We added an endpoint called sample-endpoint which is a GET method type and we have linked our endpoint with the hello function. Now lets deploy our project again.
sls deployAs a result , we will get a response like this.

You will see that we get an URL under the endpoints section which is the main response result of our function hello. Lets copy that URL and paste it in browser.
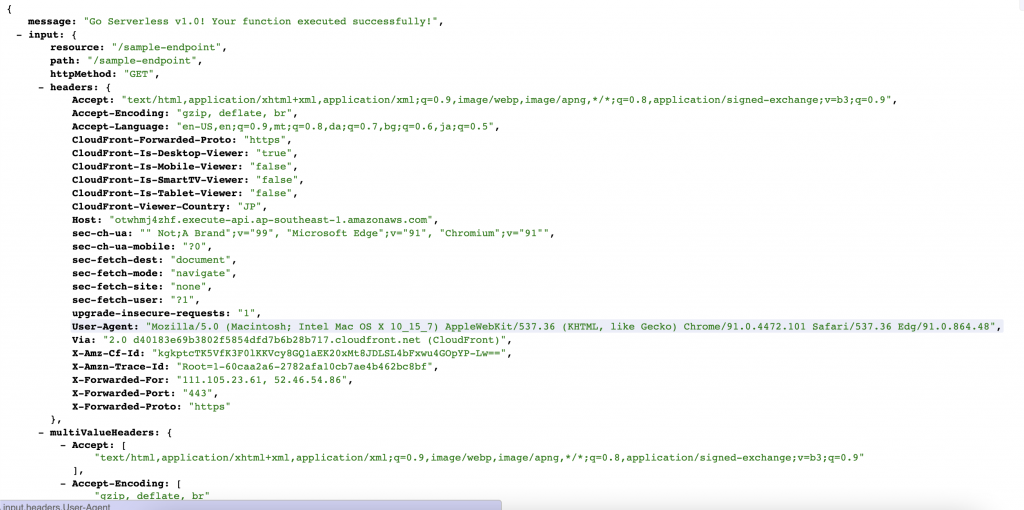
Voila ! Our endpoint works successfully. That is all for this week. I will be talking about tweaking our endpoint a bit more in next week.
Thanks for reading. Yuuma
yuuma at 2021年07月05日 11:29:53
- 2021年06月28日
- Web Service
A touch to serverless framework part 2
I talked about setting up IAM user and creating credentials on our computer. Today I will talk about creating our serverless project and start deploying to AWS cloud.
If you haven’t read part 1 , feel free to check it out here. So lets get started.
First lets build a folder, I will call it sls-api but you can name it whatever you want. Then lets go to our project , sls-api in my case and type this.
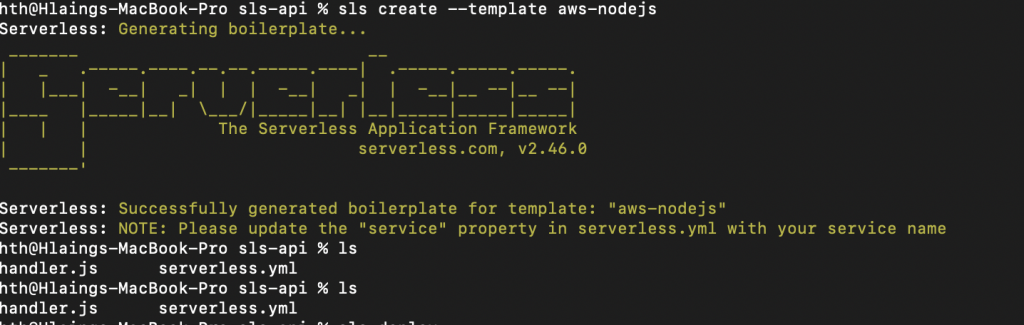
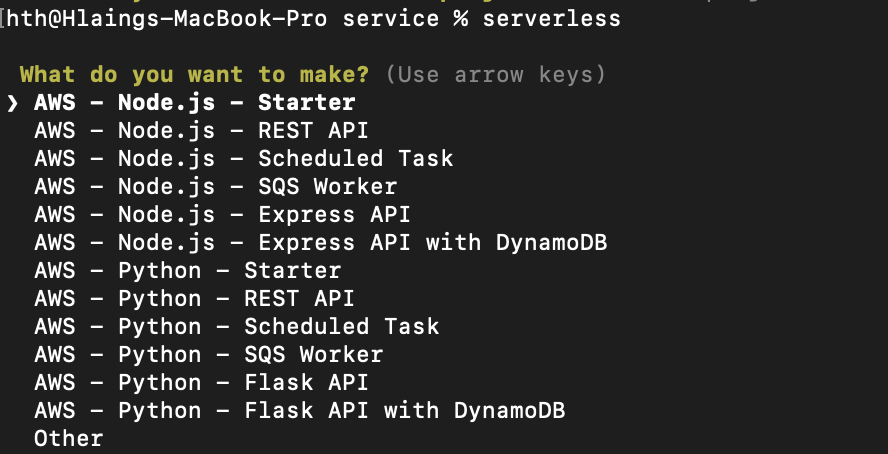
sls create --template aws-nodejsThis means we will create a node js project template for our serverless application. I told you we are going to use node js for this series in article1. After running this command , we will get an output.
We will have to update the code configuration before deploying. Open serverless.yml which is the core configuration file of our serverless project. We will add a stage and region to connect with our AWS like this

But be aware of the region of AWS. If the regions don’t match, the deployment will not work. Then Type sls deploy and wait for the result. This will start deploying our application to AWS cloud and create the necessary things.
As a result , our deployment will create a stack and lambda at AWS. As you see here, you have to know about AWS services a bit to understand these tutorial series because you are seeing stack and lambda etc. So If you don’t understand AWS, I recommend to read some articles about these services as we are focusing only on the serverless at the moment.
Firstly it will create a stack. A stack is a collection of AWS resources that you can manage as a single unit. In other words, you can create, update, or delete a collection of resources by creating, updating, or deleting stacks.Lets go and checkout on AWS stack console what the deployment build.
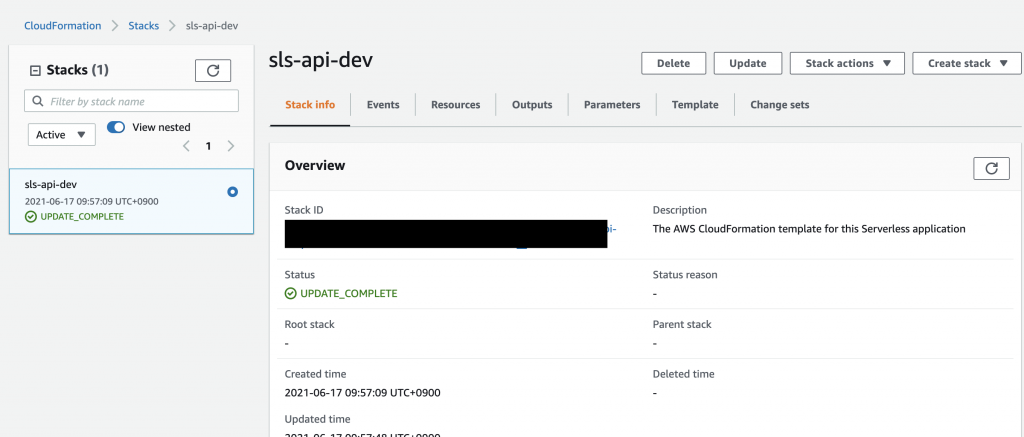
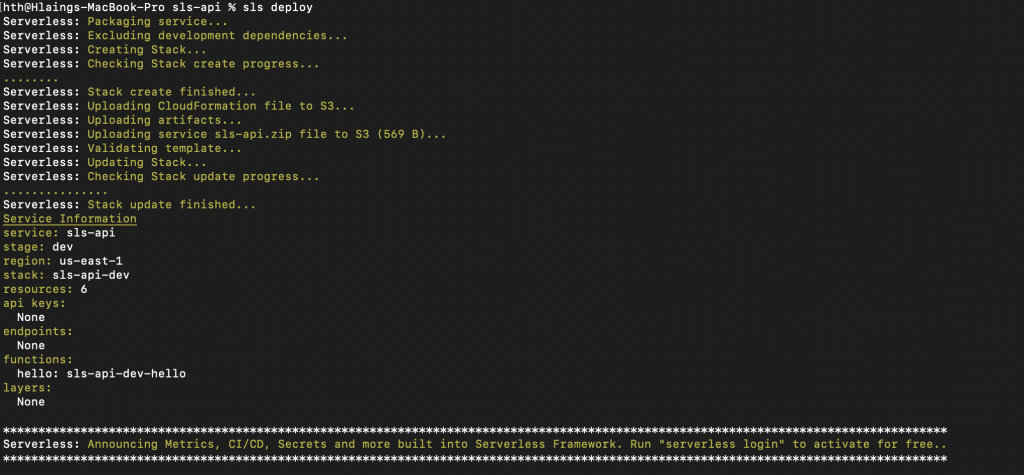
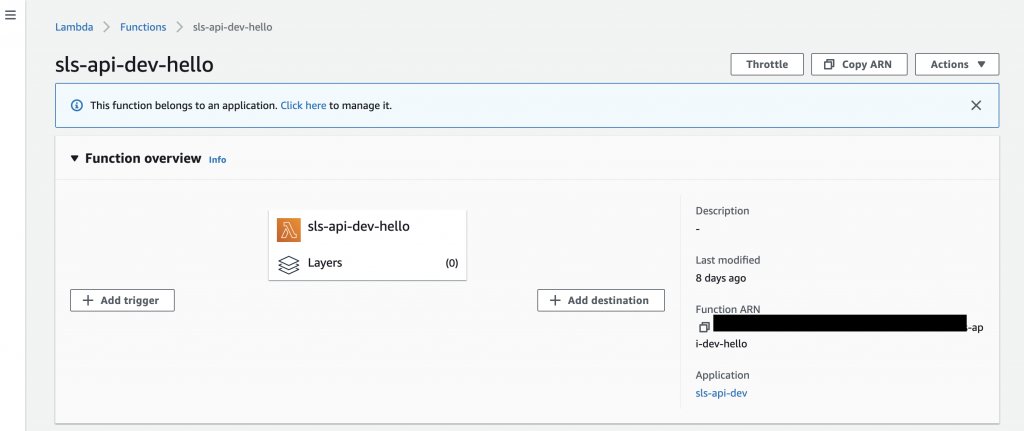
The name called sls-api is our project name and dev is the environment which we used to deploy our project. Furthermore, it will also create a lambda function. Lambda is a compute service that lets you run code without provisioning or managing servers. Lets go to Lambda console and you will get a function like this.
That is all for this week. I will talk about invoking our functions and creating endpoints in our project next week.
Yuuma
yuuma at 2021年06月28日 11:00:19
- 2021年06月21日
- Web Service
A touch to serverless framework part 1
A few weeks ago, I wrote an article about serverless and today I will make a touch to serverless framework using node.js and AWS (Amazon web service). This is just a simple and getting started article how to use serverless framework. I will be using mac OS for the operating system.
I will divided the parts because this article might be long as the article includes screenshots. So lets get started.
First, we need to check the node version in your computer. Check with node – v in your computer. Then we will install the serverless framework using npm.
sudo npm install -g serverless We will get a result like this at the end of installation.
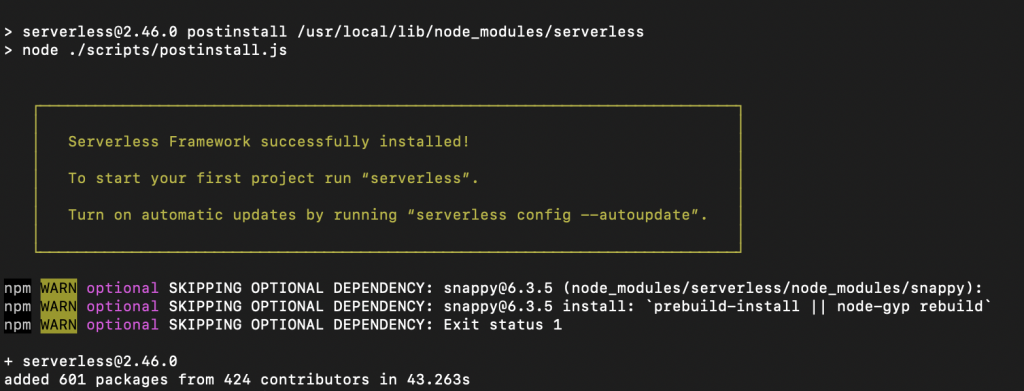
You can test whether serverless is installed on your computer or not using serverless or sls.
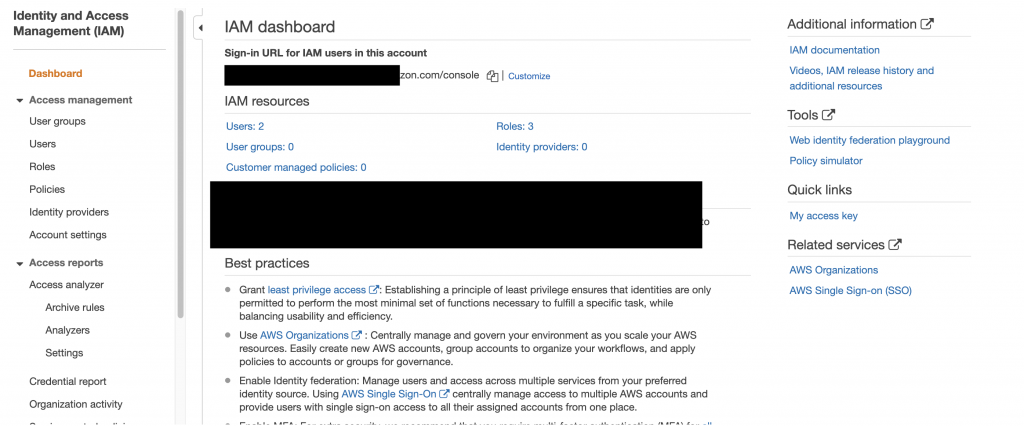
Ok , now we need to create IAM at Amazon console panel. Lets see the steps in below.
Here is the IAM dashboard.
Then we will create a new IAM user to integrate with our serverless project.

Add a username and mark the checkbox on programmatic access. Then go to next step for permission.
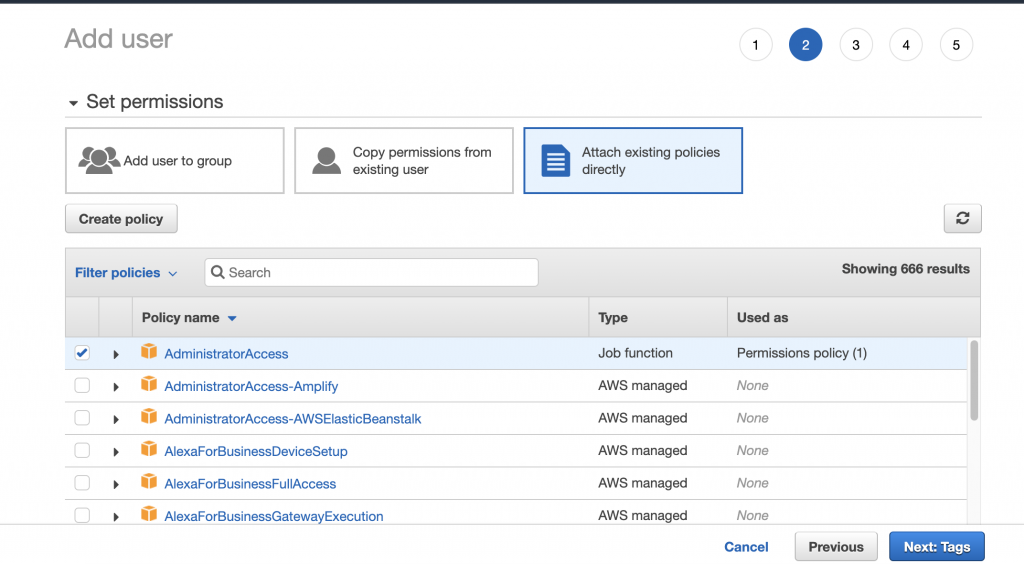
We will grant the user for administrator access for now as we want to build services from serverless configuration later on.
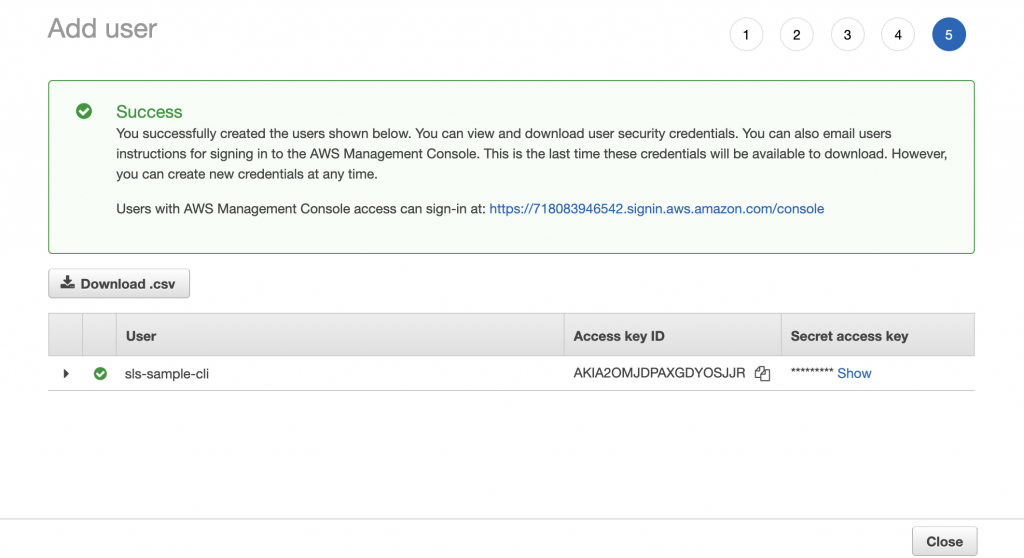
As a final step, we will get a new IAM user with access key and secret access key. We will use these keys to setup credentials in our serverless project. Lets create credentials as below
serverless config credentials --provider aws --key YOUR-ACCESS-KEY --secret YOUR-SECRET-ACCESS-KEY
This will be the correct response after hitting the above command and now we have successfully created credentials with IAM user.
In the next week, I will be talking about creating a project and start deploying from our serverless project.
Yuuma
yuuma at 2021年06月21日 11:32:52
- 2021年06月14日
- Web Service
Adding Recaptcha verification to your form
We all create forms in your system & applications. If you are a web developer , you may experience once or more creating forms. For example contact form , registration form etc. Recaptcha is a free service supported by Google which helps to protect our websites from spam and abuse. Basically A “CAPTCHA” is a test to separate human and bots apart.
Today I will guide you how to add a reCAPTCHA service in your form easily.
First thing first, we need to generate a reCAPTCHA key to add in our form. You can go to this link and click + button to create a key.
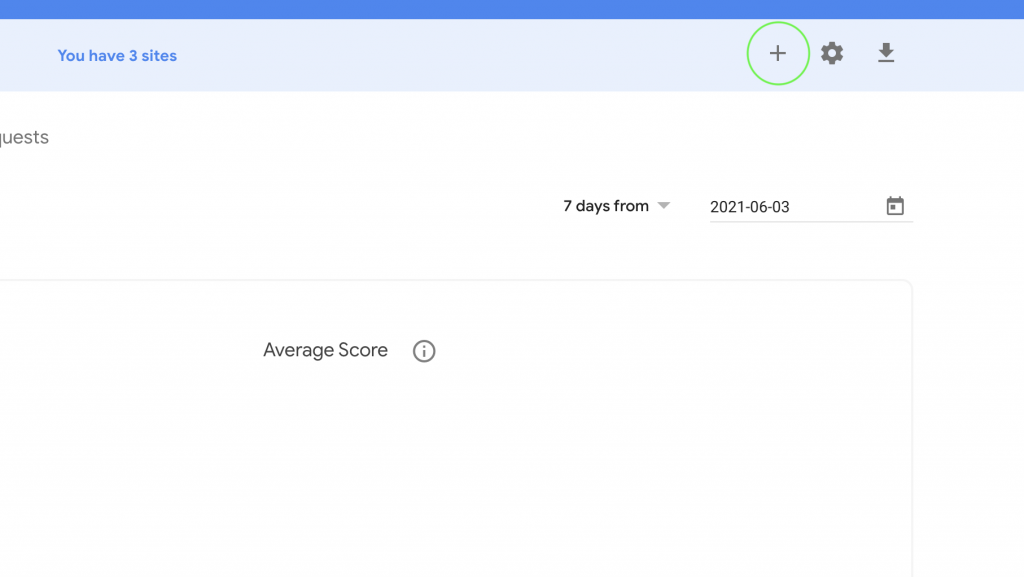
This will proceed to a form to choose the options like this.
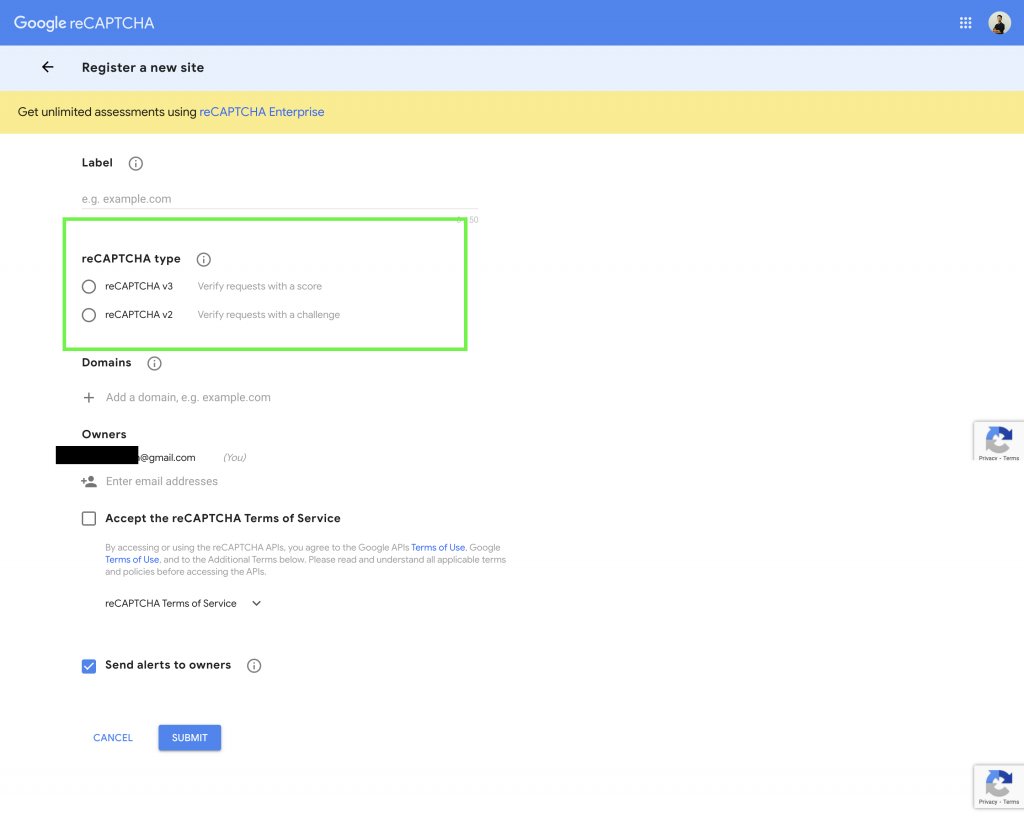
There are two versions of reCAPTCHA type for now , version 2 and 3. With reCAPTCHA v2, the only action required was to check if the user successfully solved the challenge or not. With reCAPTCHA v3, you must now decide what action to take based on the score. you may choose depending on your favour. In this tutorial , I will use v2 as I like its simplicity.
After filling up the form, you will get the reCAPTCHA site key like this.

For the source code part, we need to import the reCaptcha API JS in a script tag like this.
<script src=https://www.google.com/recaptcha/api.js></script>And we can embed our site key in HTML.
<div class="g-recaptcha" data-sitekey="YOUR-SITE-KEY-HERE"></div>Of course you can modify the css class as you like. For the validation, we can use grecaptcha.getResponse()function to validate the reCAPTCHA response. I will add a example code which is used in my project.
//This is just a sample code and can differ depending on your //source code.
if ($('.g-recaptcha').length > 0) {
   if (grecaptcha.getResponse() == "") {
      flag = 1;
        alert('Please verify Recaptch');
   } else {
      flag = 0;
   }
}

// You can also read the official documentation.
// https://developers.google.com/recaptcha/intro
As a final result on the browser, you will get a reCAPTCHA checkbox like this. This may also differ depending on your design preferences.
By Yuuma
yuuma at 2021年06月14日 11:00:28
 大人が楽しめるヒーリング絵本河童のカパと静かな森
 パワースポット 日本三大神滝布引の滝
 佐藤・広幸ドイツ魂
 Himeji Castle姫路城
 ボイドタイムお知らせアプリVoid Time 〜月を無視できない〜
 撮った写真をカレンダーに撮りカレ