技術情報
- 2021年05月13日
- 技術情報
DB管理をAdminerでおこなう
nishida at 2021年05月13日 10:00:22
- 2021年05月10日
- 技術情報
Basic Auth by PHP
There are several ways to add a basic authentication using php. Today I would like to share a snippet to add basic authentication easily.
Lets get started.
<?php

//you can define your custom username and password here.
$AUTH_USER = 'username';
$AUTH_PASS = 'password';

header('Cache-Control: no-cache, must-revalidate, max-age=0');
$credentials = !(empty($_SERVER['PHP_AUTH_USER']) && empty($_SERVER['PHP_AUTH_PW']));

//check credentials existence or wrong credentials
$auth_fail = (
	!$credentials ||
	$_SERVER['PHP_AUTH_USER'] != $AUTH_USER ||
	$_SERVER['PHP_AUTH_PW']   != $AUTH_PASS
);

//Ask for the auth. If credentials are not correct, deny the access.
if ($auth_fail) {
	header('HTTP/1.1 401 Authorization Required');
	header('WWW-Authenticate: Basic realm="Access denied"');
	exit;
}
After the coding process, you will get a confirmation alert box for authentication before accessing the website as below.
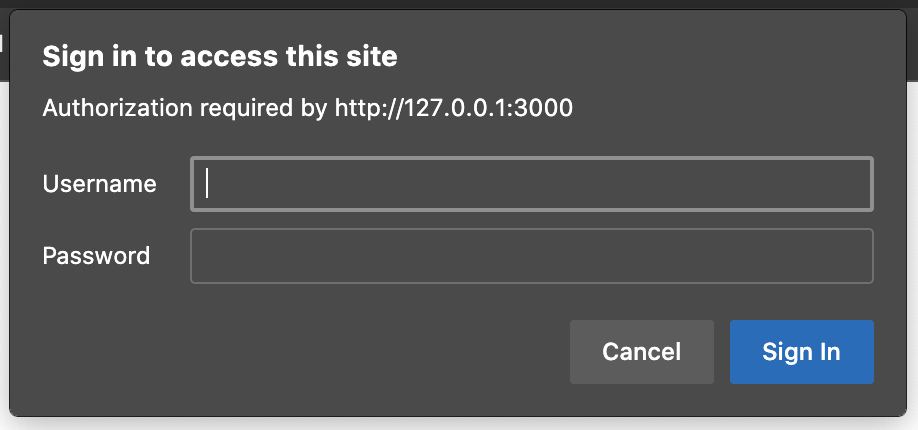
Well, I think you can now add basic auth in any of your PHP application neat and easily.
If you want to add basic authentication for contents like html and images etc , you can also do that by configuring .htaccess
Yuuma
yuuma at 2021年05月10日 11:00:09
- 2021年05月07日
- 技術情報
Visual Studio Code for PHP developers
Makes it clean and pretty code each time you open VS Code to help us all become better engineers! I want to share some important VS Code tips and tricks.
Quickly open files
Keyboard Shortcut: Ctrl+P
Access all available commands.
Keyboard Shortcut: Ctrl+Shit+P
Navigate between recently opened folders and workspace
Keyboard Shortcut: Ctrl+R
There are many things you can do to customize your code format.
- Change your theme
Firstly Keyword Shortcut: Ctrl+Shit+P then go to type >theme and select your preference theme.
If you want to add color theme, I recommend Gruvbox Material. It’s totally pretty color theme that I’ve used.
Customize your keyboard shortcuts
Keyboard Shortcut: Ctrl+K Ctrl+S
Search and Install extensions
Keyboard Shortcuts : Ctrl+Shift+X
You can find extensions in the VS Code Marketpalce.
Integrated Terminal
Keyboard Shortcut: Ctrl+`
Toggle SideBar
Keyboard Shordcut: Ctrl+B
Toggle Panel
Keyboard Shordcut: Ctrl+J
Zen mode
Keyboard Shortcut: Ctrl+K Z
Press Esc twice to exit Zen mode.
Move to Explorer window
Keyboard Shortcut: Ctrl+Shit +E
Navigation entire history
Keyboard Shordcut: Ctrl+Tab
Multi Cursor selection
Keyboard Shortcut: Ctrl+Shit+Left
To set cursors above or below the current position use
Keyboard Shortcut: Ctrl+Alt+Up or Ctrl+Alt+Down
Copy line up / down
Keyboard Shortcut: Shift+Alt+Up or Shift+Alt+Down
Code Formatting
Whole document format: Shift+Alt+F
Code Folding
Keyboard Shortcut: Ctrl+Shift+[ or Ctrl+Shift+]
Select Current Line
Keyboard Shortcut: Ctrl+L
Navigate to beginning and end of file
Keyboard Shortcut: Ctrl+Home and Ctrl+End
Move line up and down
Keyboard Shortcut: Alt+Up or Alt+Down
Git integration
Keyboard Shortcut: Ctrl+Shift+G
You can install other SCM providers from the Extension Marketplace. Most of the time I’m preferred GitLens extension. It’s incredible useful.
Diffs
From the Source Control view, select a file to open the diff.
Views
The default view for diffs is the side by side view.
Toggle inline view by clicking the More Actions (…) button in the top right and selecting Toggle Inline View.
Branches
Easily switch between Git branches via the Status Bar.
Staging
Hover over the number of files and click the plus button.
Click the minus button to unstage changes.
Undo Last Commit
Click the (…) button and then select Undo Last Commit to undo the previous commit. The changes are added to the Staged Changes section.
See Git output
VS Code makes it easy to see what Git commands are actually running. This is helpful when learning Git or debugging a difficult source control issue
Use the Toggle Output command (Ctrl+Shift+U) and select Git in the dropdown.
By Ami
asahi at 2021年05月07日 10:00:42
- 2021年04月23日
- 技術情報
How AJAX Works Using the jQuery Library
The jQuery ajax() method provides core functionality of AJAX in jQuery. It sends asynchronous HTTP requests to the server.
The standard way of making an AJAX call using jQuery is rather simple – by using the $.ajax() function:
<script>
$.ajax(
  '/jquery/getdata',
  {
      success: function(data) {
        alert('AJAX call was successful!');
        alert('Data from the server' + data);
      },
      error: function() {
        alert('There was some error performing the AJAX call!');
      }
   }
);
</script>
As you already known, the $ sign is used to refer to a jQuery object.
In the above example, the first parameter is string URL to which you want to submit or retrieve the data.
The second parameter is the JSON format. By default, ajax() method performs http GET request if option parameter does not include method option.
In most cases, we will need to specify the success and error callbacks. The success callback will be called after the successful completion of the Ajax call. On the other hand, the failure callback will be called if something goes wrong and there was an issue performing the AJAX call.
Using Promises for AJAX with jQuery
$.ajax method supports JavaScript Promises as well.
.done() as replacement for .success()
.fail() as replacement for .error()
.always() as replacement for .complete()
$.ajax({
       data: someData,
       dataType: 'json',
       url: '/path/to/script'
}).done(function(data) {
      // If successful
      console.log(data);
}).fail(function(jqXHR, textStatus, errorThrown) {
      // If fail
      console.log(textStatus + ': ' + errorThrown);
});
Chaining Works
Assign the $.ajax() method to a variable, for which we can chain promise callbacks to. In this example, the $.ajax() method returns a promise object natively, which we can use chaining too:
var ajaxCall = $.ajax({
   context: $(element),
   data: someData,
   dataType: 'json',
   url: '/path/to/script'
});

ajaxCall.done(function(data) {
    console.log(data);
});
Multiple AJAX calls
We can compound several AJAX calls with their status $.when().
var a1 = $.ajax({...}),
a2 = $.ajax({...});

$.when(a1, a2).done(function(r1, r2) {
  console.log(r1[0]);
  console.log(r2[0]);
});
Dependence chain of AJAX requests
We can also chain multiple AJAX request. For example, when the second AJAX call relies on returned data on the first call.
var a1 = $.ajax({
             url: '/path/to/file',
             dataType: 'json'
         }),

    a2 = a1.then(function(data) {
    // .then() returns a new promise
           return $.ajax({
              url: '/path/to/another/file',
              dataType: 'json',
              data: data.sessionID
             });
         });

a2.done(function(data) {
    console.log(data);
});
By Ami
asahi at 2021年04月23日 10:05:18
Microsoft buys Nuance for nearly $20 billion deal
Microsoft said it agreed to buy Nuance Communications, a cloud and artificial intelligence (AI) software company, in a cash transaction valued at $ 19.7 billion, including debt on Monday.

So what is Nuance ?
“Nuance provides the artificial intelligence layer at the point of healthcare delivery and is a pioneer in the real-world application of enterprise artificial intelligence” Microsoft CEO Satya Nadella said in a statement. “Artificial intelligence is the highest priority in technology and healthcare is most urgent application.”
Nuance products include multiple clinical speech recognition as a service (SaaS) software offerings built on Microsoft Azure. The company’s solutions work with major healthcare systems and are currently used in 77% of US hospitals, noted in a statement of him.
Beyond healthcare, Nuance provides expertise in artificial intelligence and customer engagement solutions in interactive voice response, virtual assistants, and digital and biometric solutions.
Microsoft’s acquisition of Nuance builds on the existing partnership between the companies announced in 2019 to help transform healthcare delivery. Last year, the software giant introduced Microsoft Cloud for Healthcare to address the needs of the rapidly transforming and growing healthcare industry.
This combination might results solutions and expertise to deliver new cloud and artificial intelligence capabilities in healthcare and other industries, and represent the latest step in Microsoft’s industry-specific cloud strategy, the Redmond-based company noted.
Yuuma
yuuma at 2021年04月19日 11:00:52
 大人が楽しめるヒーリング絵本河童のカパと静かな森
 パワースポット 日本三大神滝布引の滝
 佐藤・広幸ドイツ魂
 Himeji Castle姫路城
 ボイドタイムお知らせアプリVoid Time 〜月を無視できない〜
 撮った写真をカレンダーに撮りカレ